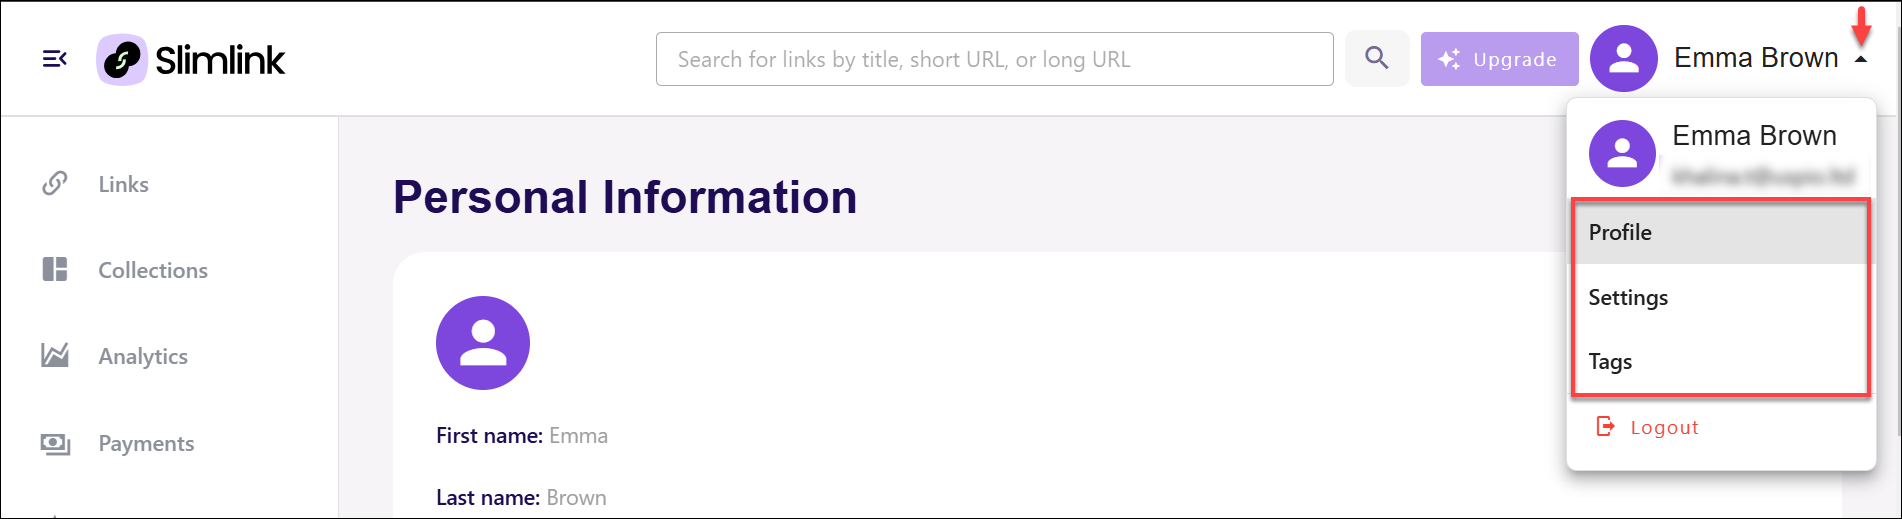
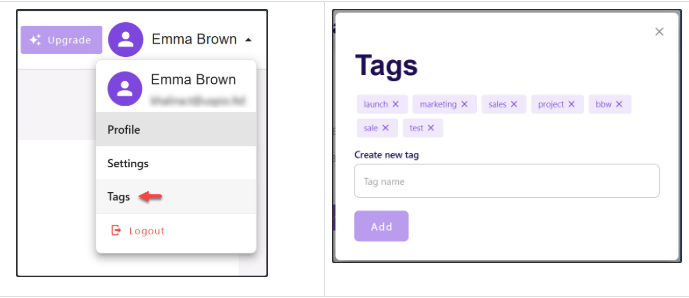
Your user menu can be accessed by using the dropdown in the top right corner of every page next to your name. It contains 3 sections - Profile, Settings and Tags.
Profile
The Profile section lets you update your personal details, including adding a new email address for better account management. You can also view a history of your actions, providing a detailed log of activities associated with your account for easy reference and tracking.
Here, you can:
- Edit your personal information
- Add and manage your emails
- View and download your actions history
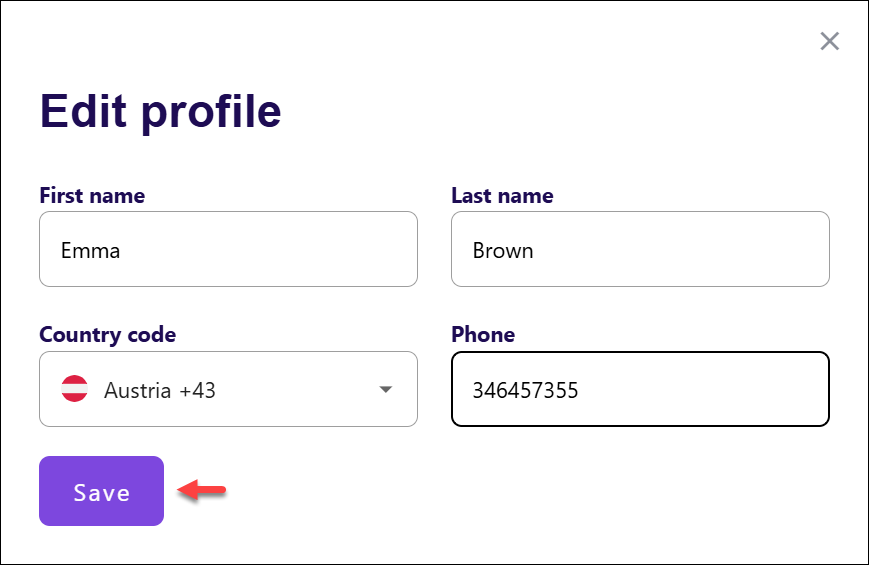
To edit your personal details (name and phone):
- Select Profile from your user menu.
- Click Edit profile under Personal Information.

- In the pop-up window, update your details and click Save.
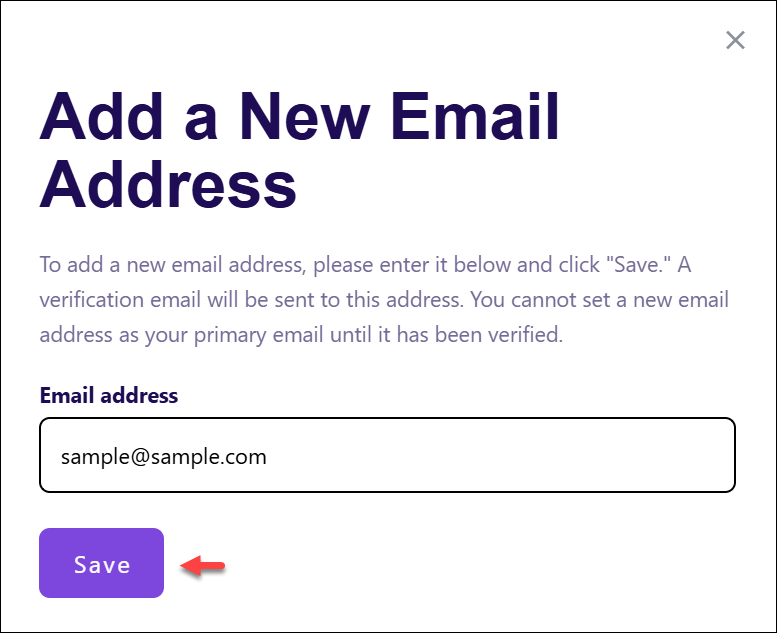
To add and manage your emails:
- Select Profile from your user menu.
- Click Add a New Email Address in the Email section.

- In the pop-up window, enter the email address, and click Save.
- All added emails need to be verified. Click Send code to confirm new email.
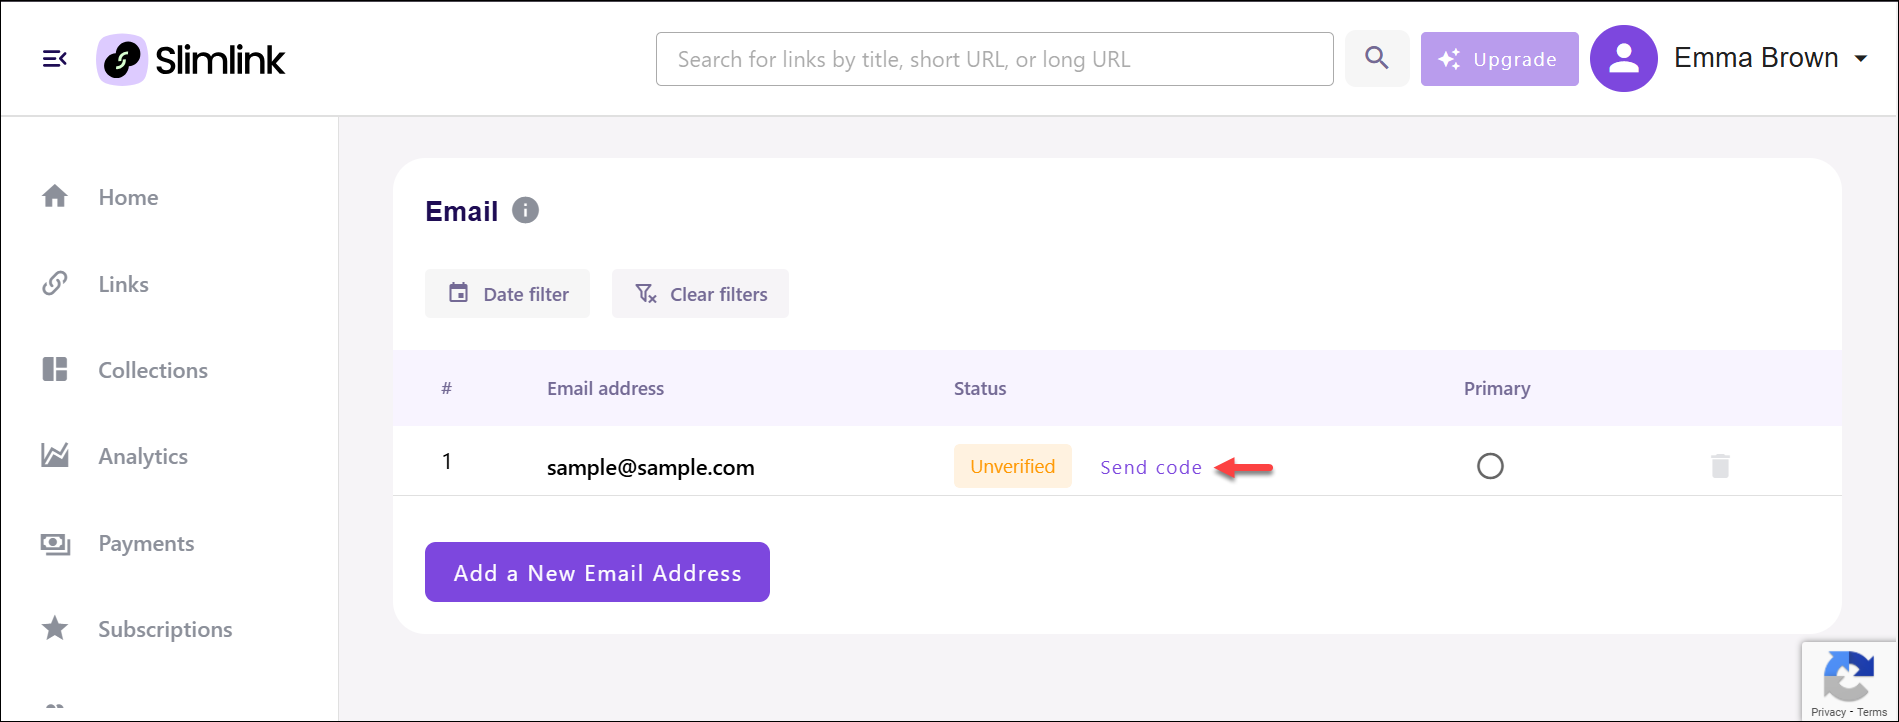
- You will receive a confirmation letter to the email account you’ve added. Click the Confirm email button in the email body to verify new account.
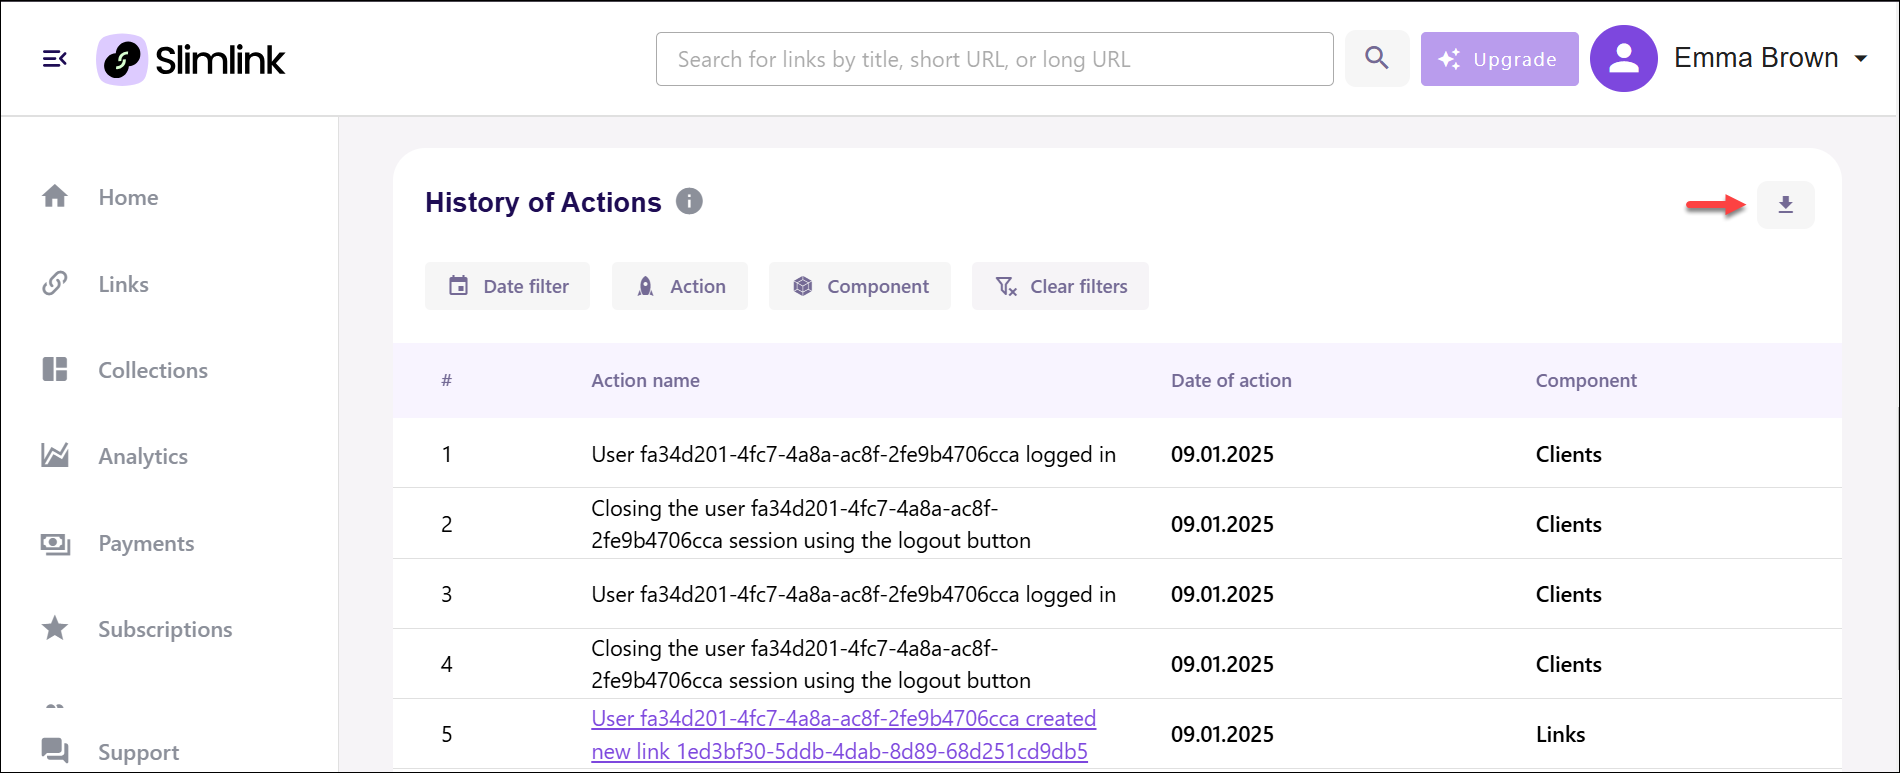
To view and download your actions history
- Select Profile from your user menu.
- Scroll down to see the History of Actions list.
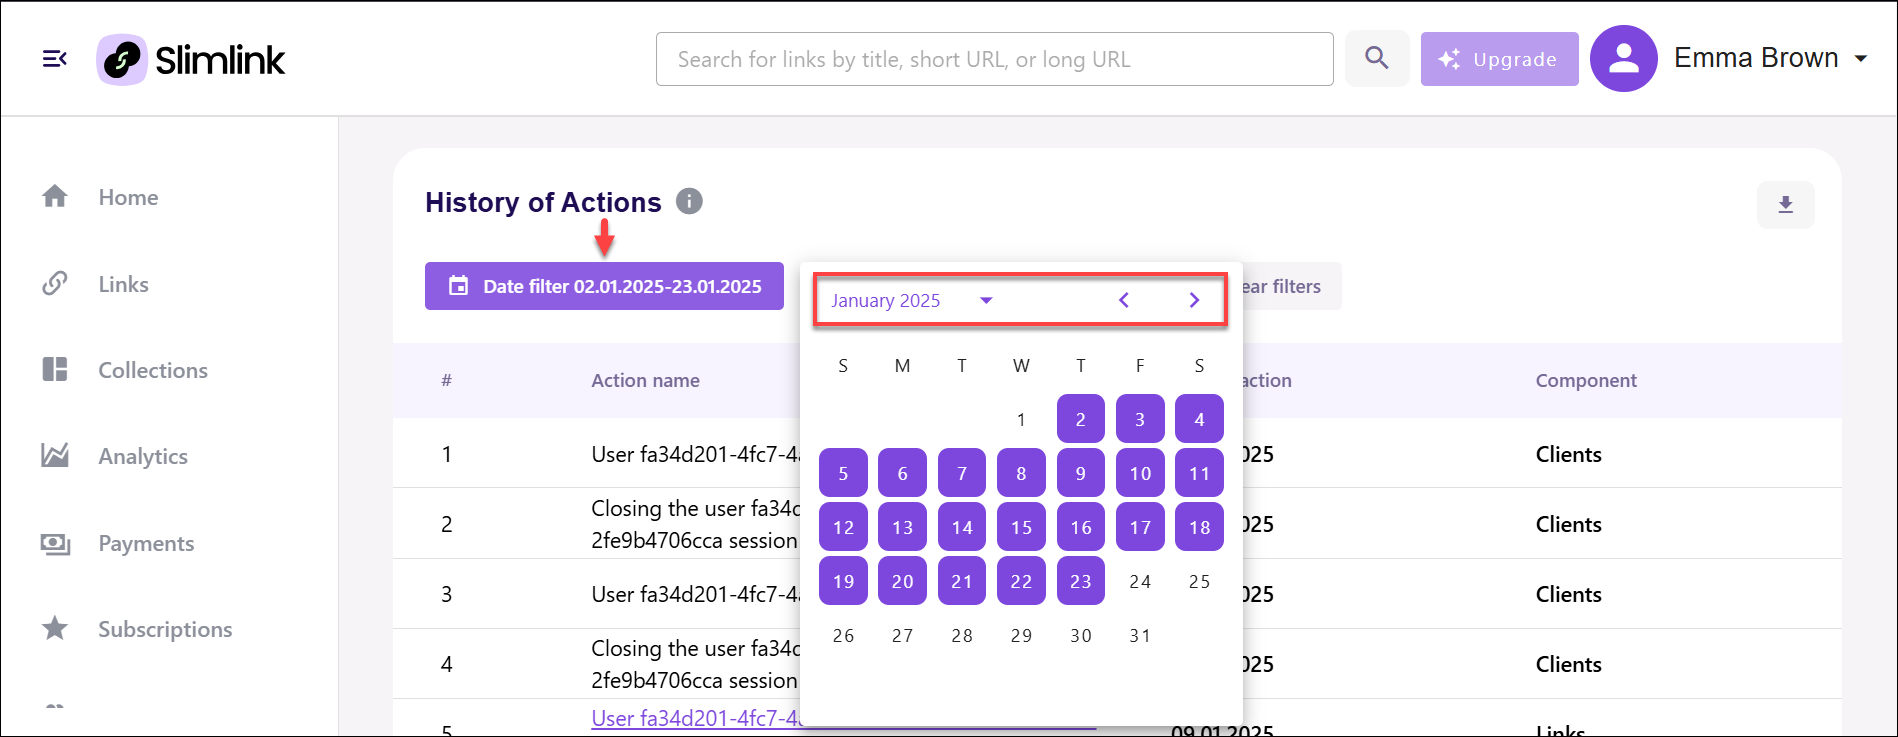
- Use the filters as described below to customize the resulting view.
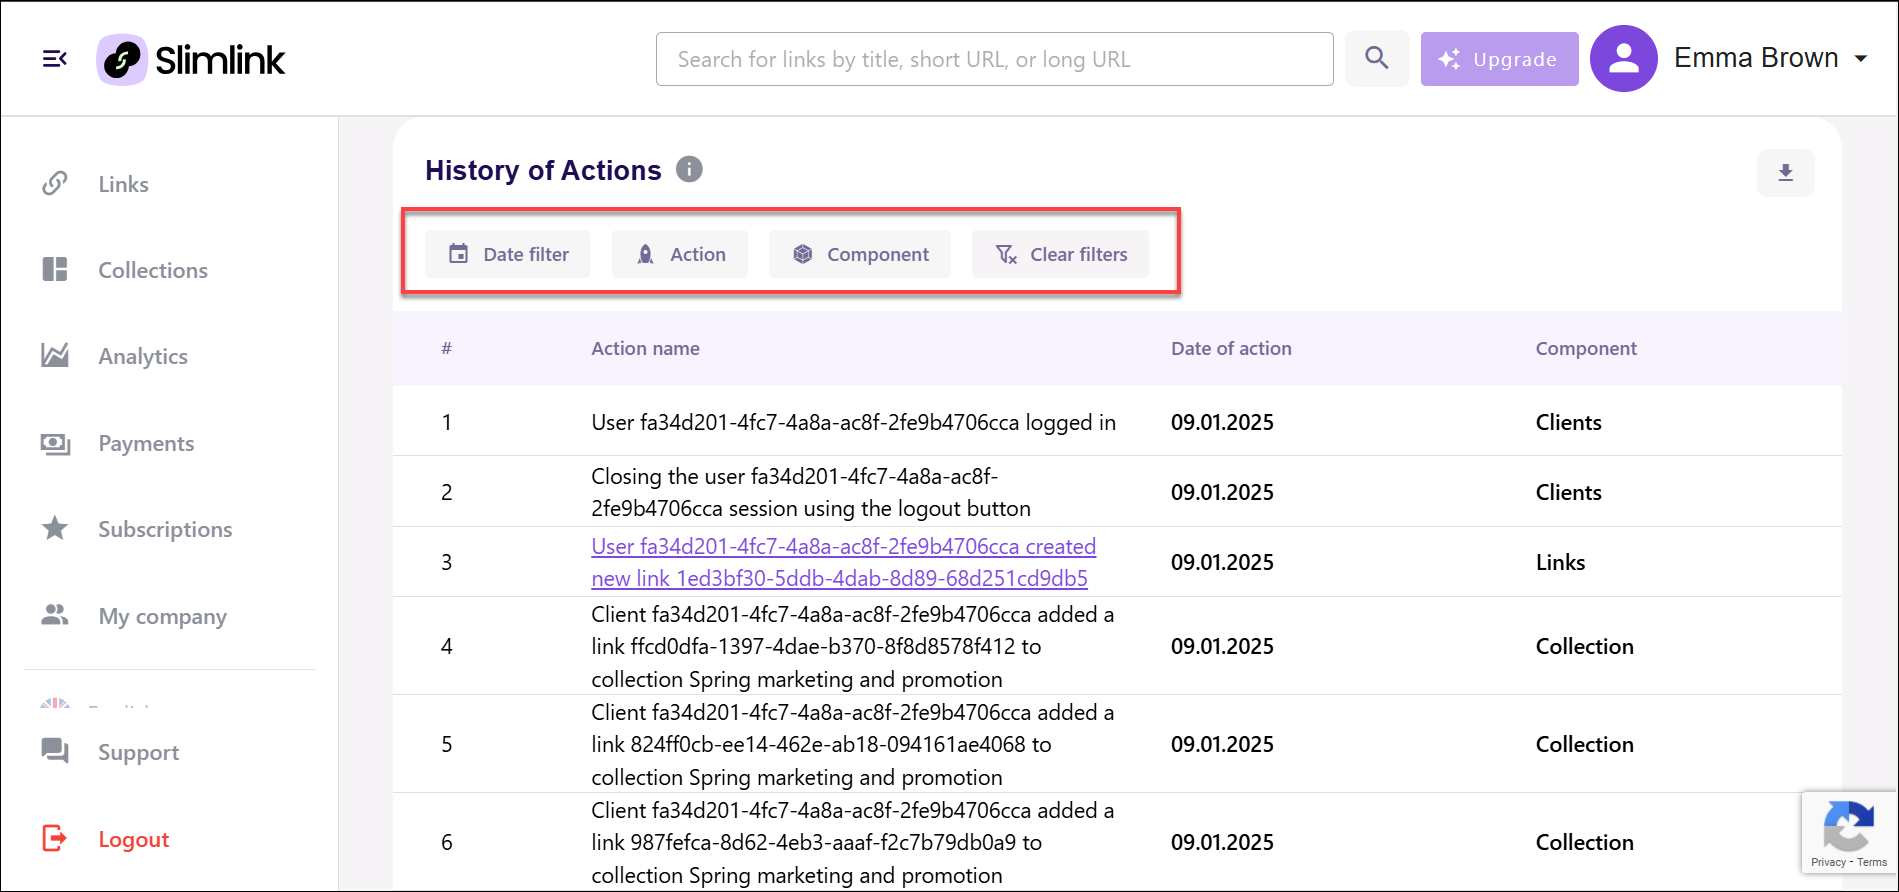
- Date Filter: Provides the ability to specify a time range for narrowing down actions to a particular period, ensuring focus on relevant historical records. Simply use the arrows to select a month, dropdown to select a year, then select the required dates in the date picker window.
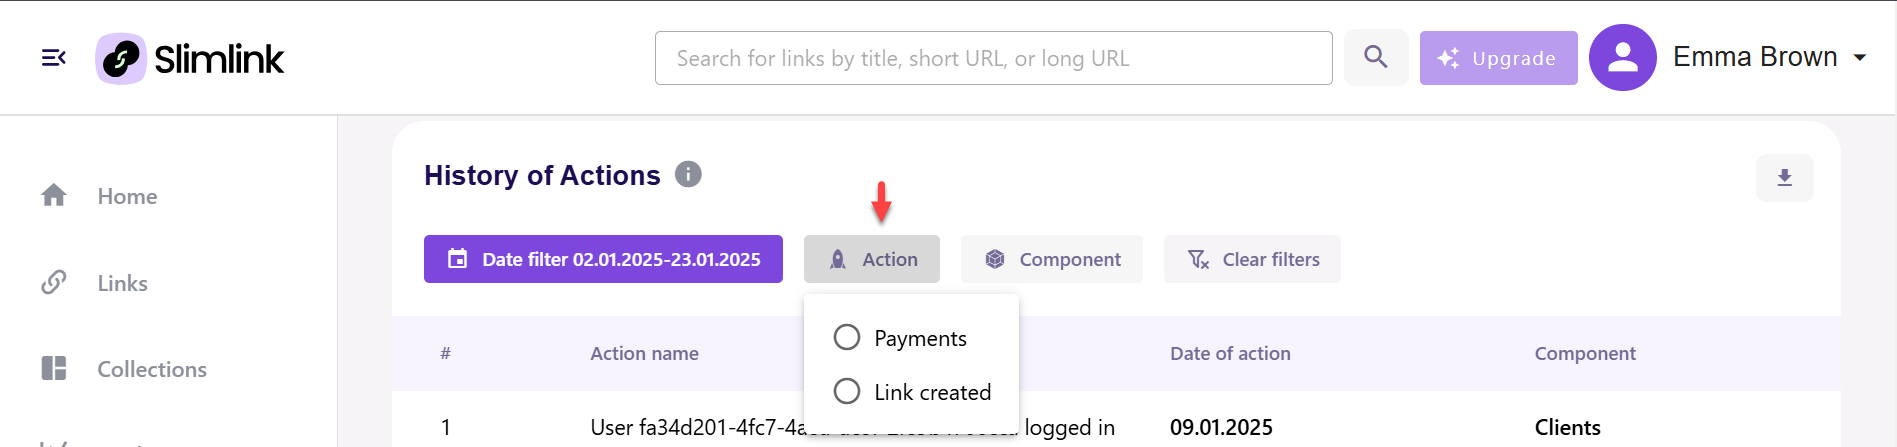
- Action Filter: Offers options to filter specific types of actions based on predefined categories, allowing quick access to targeted information about performed activities. Select the required items from the list.
- Component Filter: Enables filtering actions related to specific platform components, providing a more granular view of operations associated with particular features or sections. Select the required components from the list.

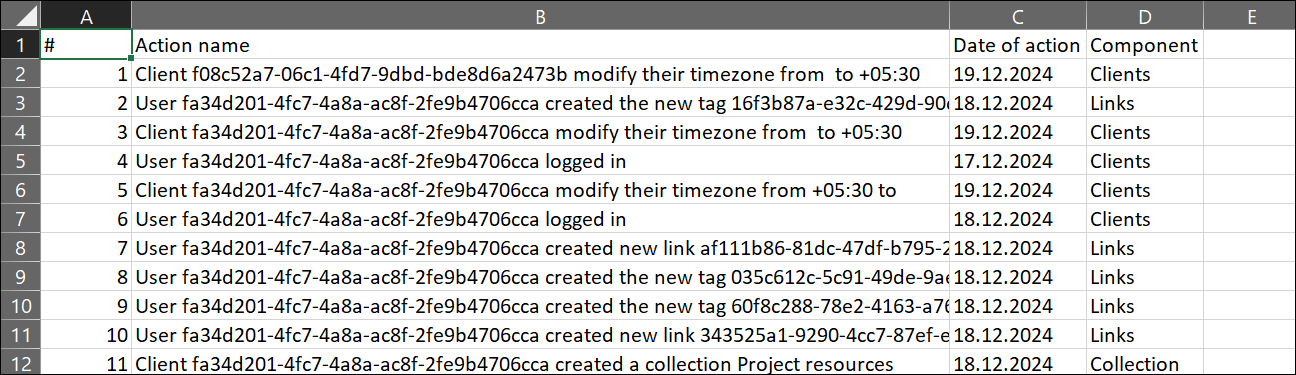
- Here, you can also download your history of actions by clicking the Download icon.
- Save the downloaded file on your device.
Settings
The Settings page enables you to manage your account preferences and tailor them to your needs. Organized into clear sections, it provides an intuitive interface with interactive elements to easily update and save your account configurations.
Here, you can:
- Update your password
- Configure your time zone
To update your password
- Select Settings from your user menu.
- In the Edit password section, enter your current password, then enter and confirm the updated password.
🔒 The password must contain at least 10 but not more than 24 characters. It must include at least one uppercase letter, one number, and one special symbol (e.g. #, $, ~).
- Click Edit password to apply the changes and save the updated version. On the next login, remember to use your new password.

To configure your time zone:
- Select Settings from your user menu.
- Check the Use a specific time zone box to change the default settings.
- From the dropdown list, select your time zone and click Save to apply the changes. Note that selection of the correct time zone is important for accurate display of tracking and analytics data.

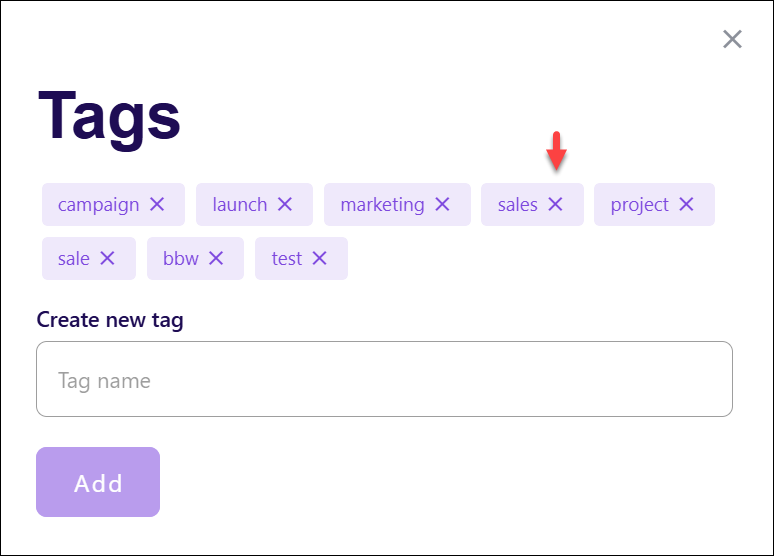
Tags
The Tags section displays all the tags you've created, providing a centralized location to manage them. You can add new tags to organize your links more effectively or remove any that are no longer needed, keeping your tagging system streamlined and up-to-date.Here, you can:
- View all tags
- Add new tags
- Remove tags
To view all tags, simply select Tags from the user menu. All tags are displayed in the pop-up window.
To add new tags, enter the name in the editable Create new tag field, and click Add
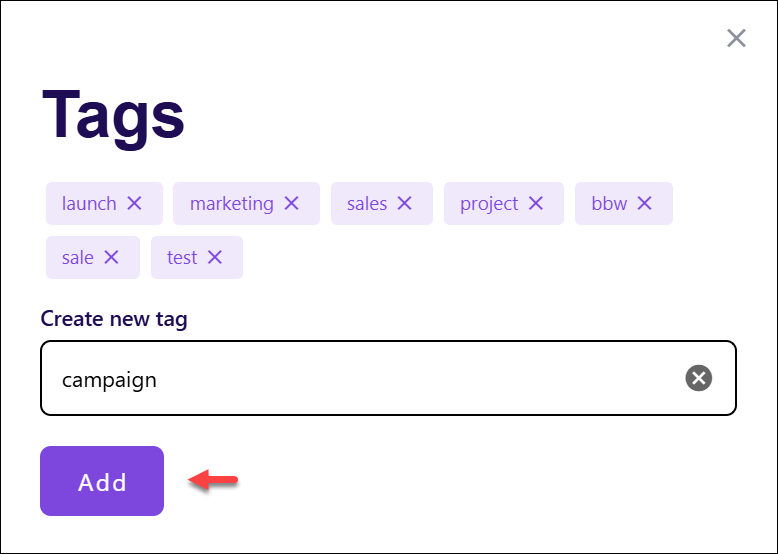
To delete tags, click the cross icon next to the required name.