
Tanya Khalina
Content writer
Using a custom domain with Slimlink allows you to create short links that reflect your brand, making them more recognizable and trustworthy for your audience. When your links align with your brand identity, they not only look professional but also encourage higher engagement and click-through rates.
Using an Empty Domain
If your domain is not being used for any website or content, you can configure it entirely for Slimlink.
Step 1: Prepare Your Domain
- Ensure you own the domain (e.g., yourdomain.com)
- Access your domain registrar’s DNS settings (e.g., GoDaddy, Namecheap, or Cloudflare).
Step 2: Add the Domain to Slimlink
- Log in to your Slimlink account.
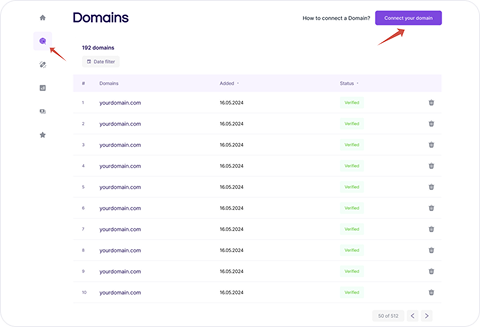
- Go to Domains > Connect your domain.
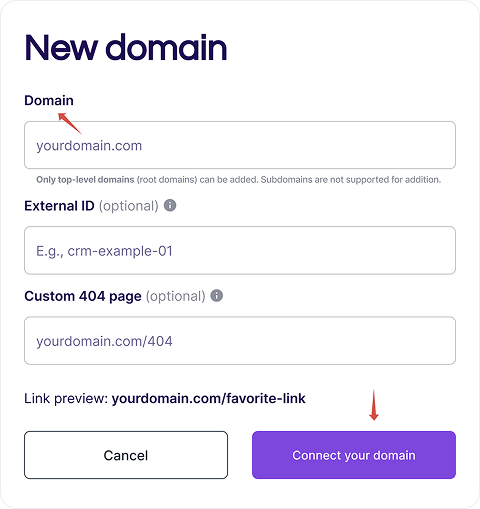
- Enter your domain (e.g., yourdomain.com) and click Connect your domain.
Step 3: Configure DNS Records
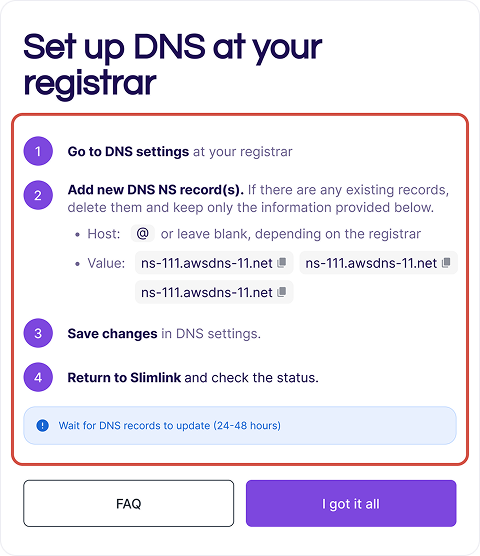
- Take necessary DNS records from Slimlink and go to your registrar’s dashboard
- In your domain registrar’s dashboard, add the NS record(s):
- Host: @ (or leave blank, depending on the registrar).
- Value: ns-111.awsdns-11.net
Step 4: Wait for Domain verification
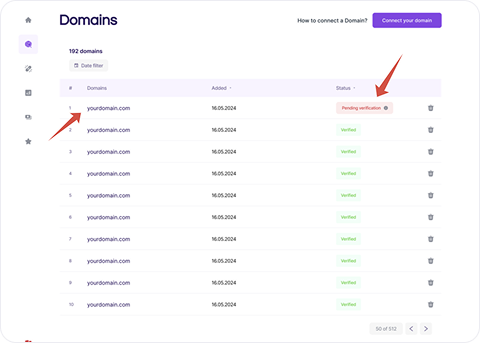
- Return to Slimlink and check if the Domain has received “Verified” status
- Refresh of the verification status happens automatically every time you reload the page
- You may need to status for DNS propagation (up to 24-48 hours) before the Domain will have Verified staus in the Domains dashboard at Slimlink
Where to get a custom domain?
If you don't already have a domain, you can register one through popular domain registrars such as:
OVHcloud
Open
France
Hetzner
Open
Germany
Hostinger
Open
Lithuania
Namecheap
Open
United Kingdom
Cloudflare
Open
Global, with European servers
GoDaddy
Open
Global, US-based
Note:
- DNS changes may take up to 48 hours to propagate (usually faster).
- If your domain isn't verifying, please check:
- That your’ve entered the correct DNS records (NS-records) at your registrar’s dashboard
- If there are any restrictions from your registrar (like WHOIS protection)
For additional assistance, please contact Slimlink support or your domain registrar.