On Slimlink, the link analytics are enabled by default when you create a link. This ensures that data tracking begins immediately, allowing you to monitor performance without any extra steps. If you need to verify or adjust analytics settings, you can edit the link details and confirm that analytics tracking is active. With analytics enabled, you can gain valuable insights such as clicks, geographic data, and referral sources to evaluate the effectiveness of your links.
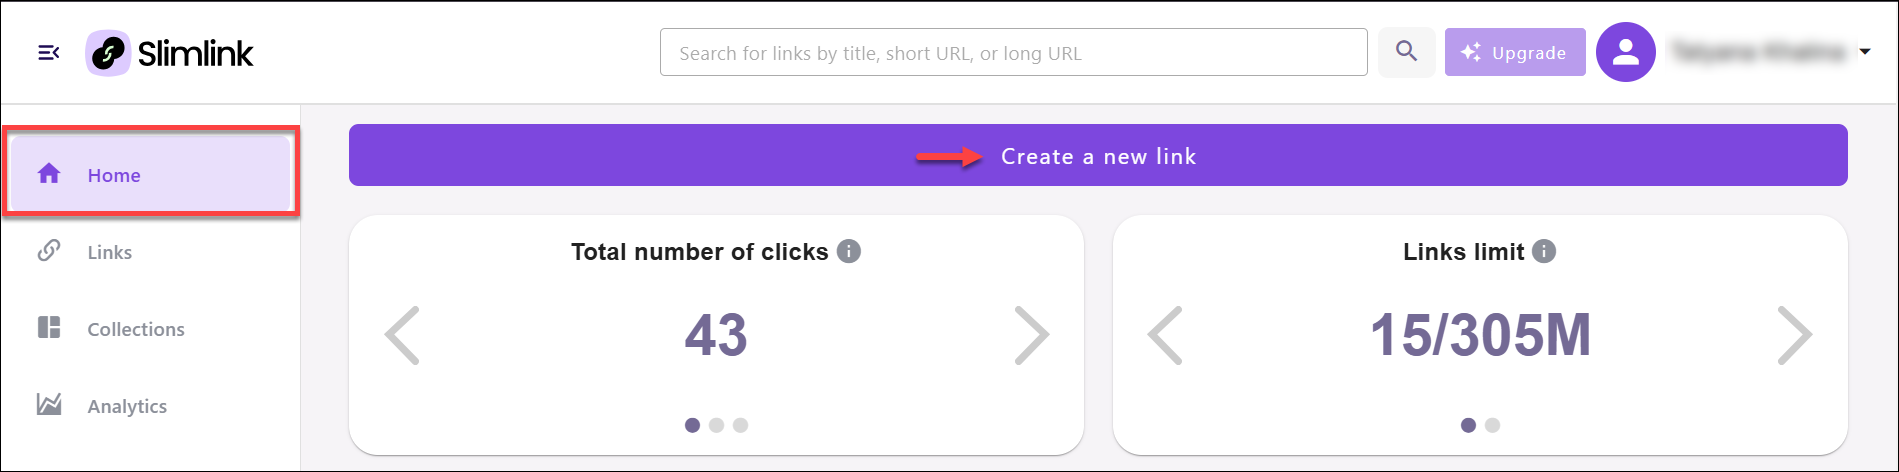
To enable link analytics when creating a link:
- Log in to your Slimlink account.
- Click Create a new link on the Home page or in the Links section.
- On the link creation screen, the Activate link analytics toggle is ON by default. Leave this setting as is to start gathering analytics.
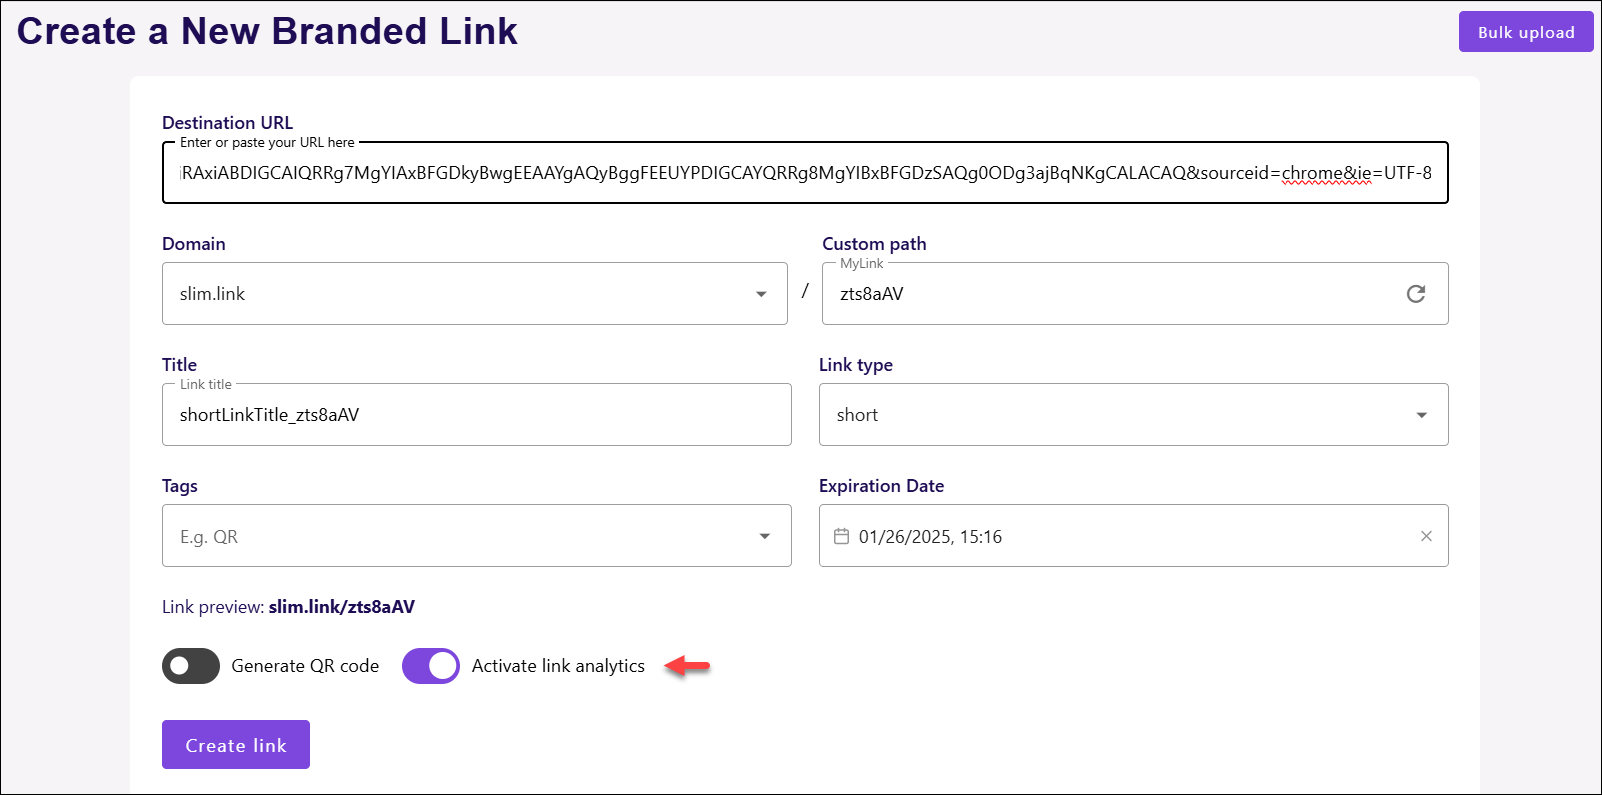
- Click Create link to save the shortened link along with analytics option.
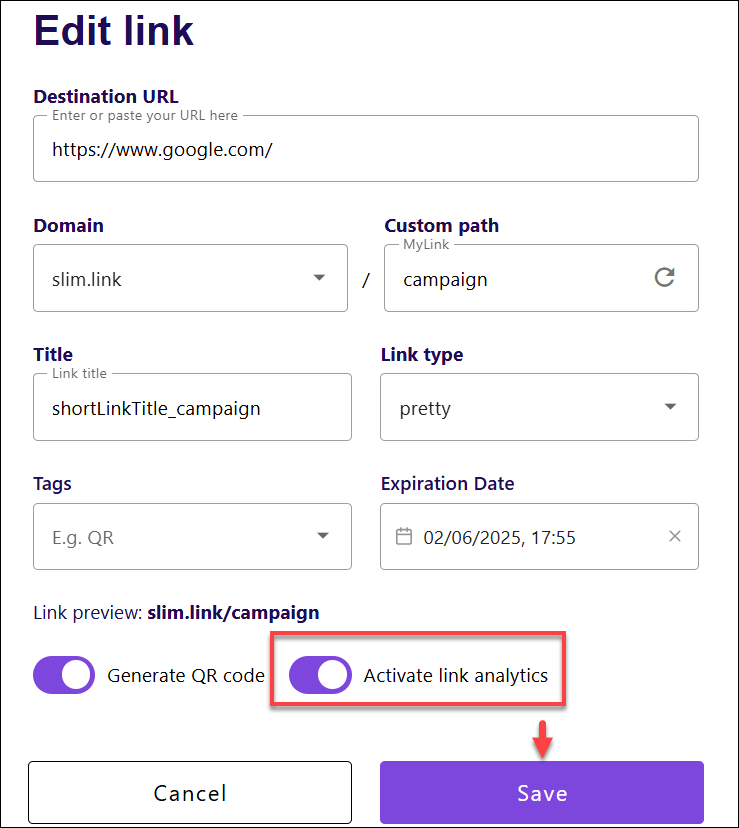
To enable link analytics when editing a link:
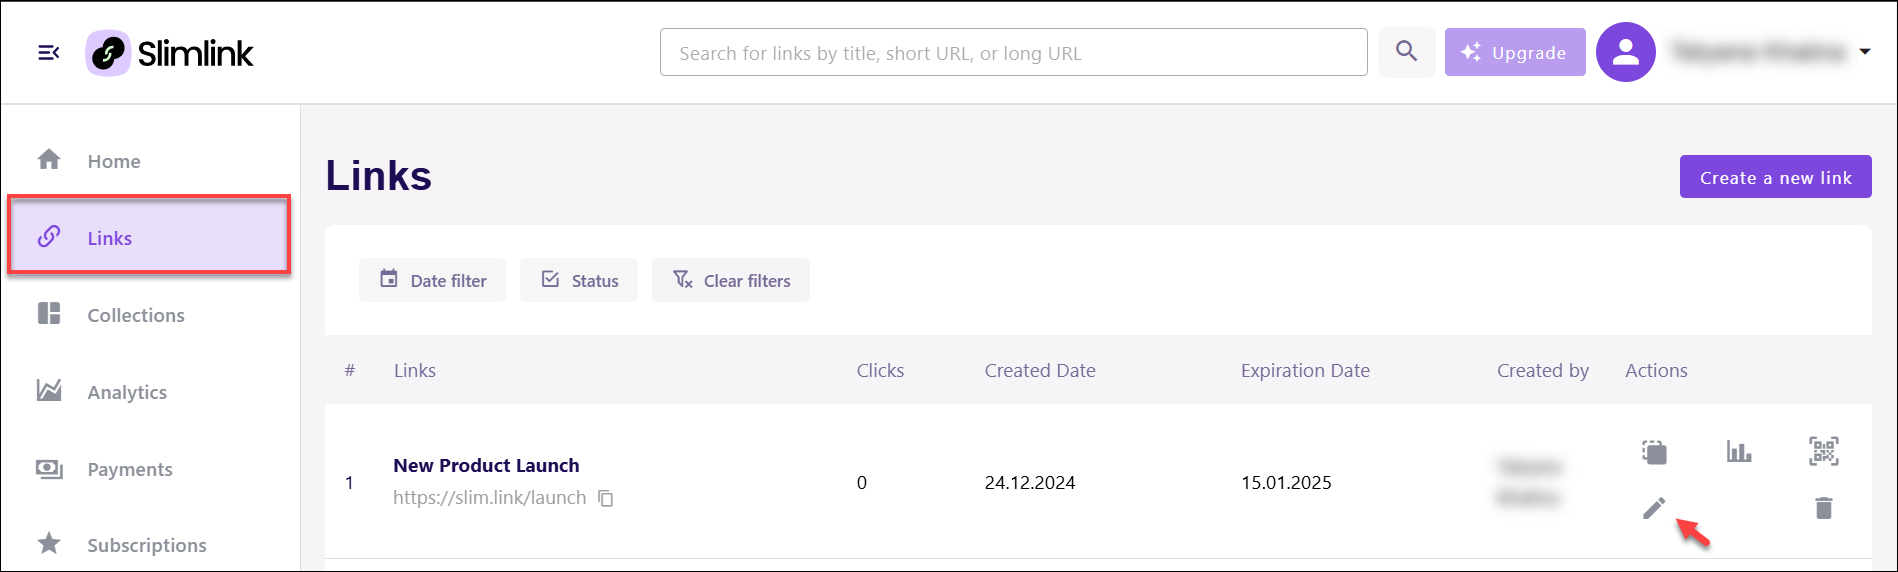
- Log in to your Slimlink account.
- Navigate to the Links section and find the required link. You can quickly check if analytics is enabled by looking at the icon, which will indicate whether it is active or inactive.
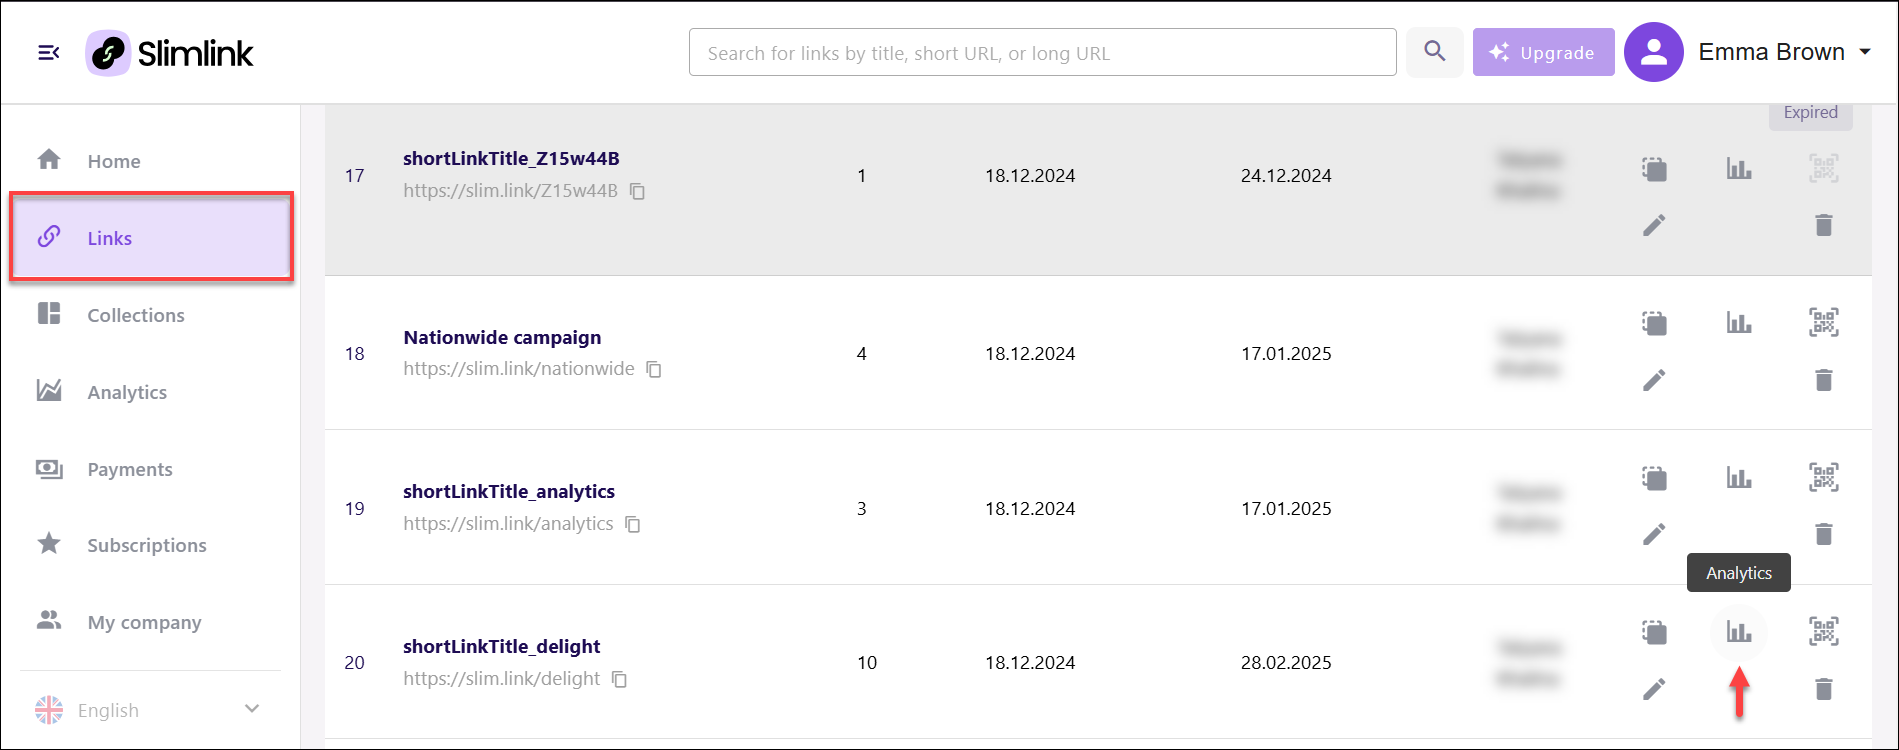
- Click the Edit icon next to the required link.
- In the link editing window, turn the Activate link analytics toggle ON and click Save.