On Slimlink, you can create, edit, and delete roles to fit your company specific needs, ensuring that the right people have the appropriate level of access. This level of customization ensures that your platform setup matches your workflow, improves efficiency, and keeps sensitive data secure by controlling access based on user roles.
 That’s it, the role is created and added to the account. It can now be assigned to the corresponding user(s).
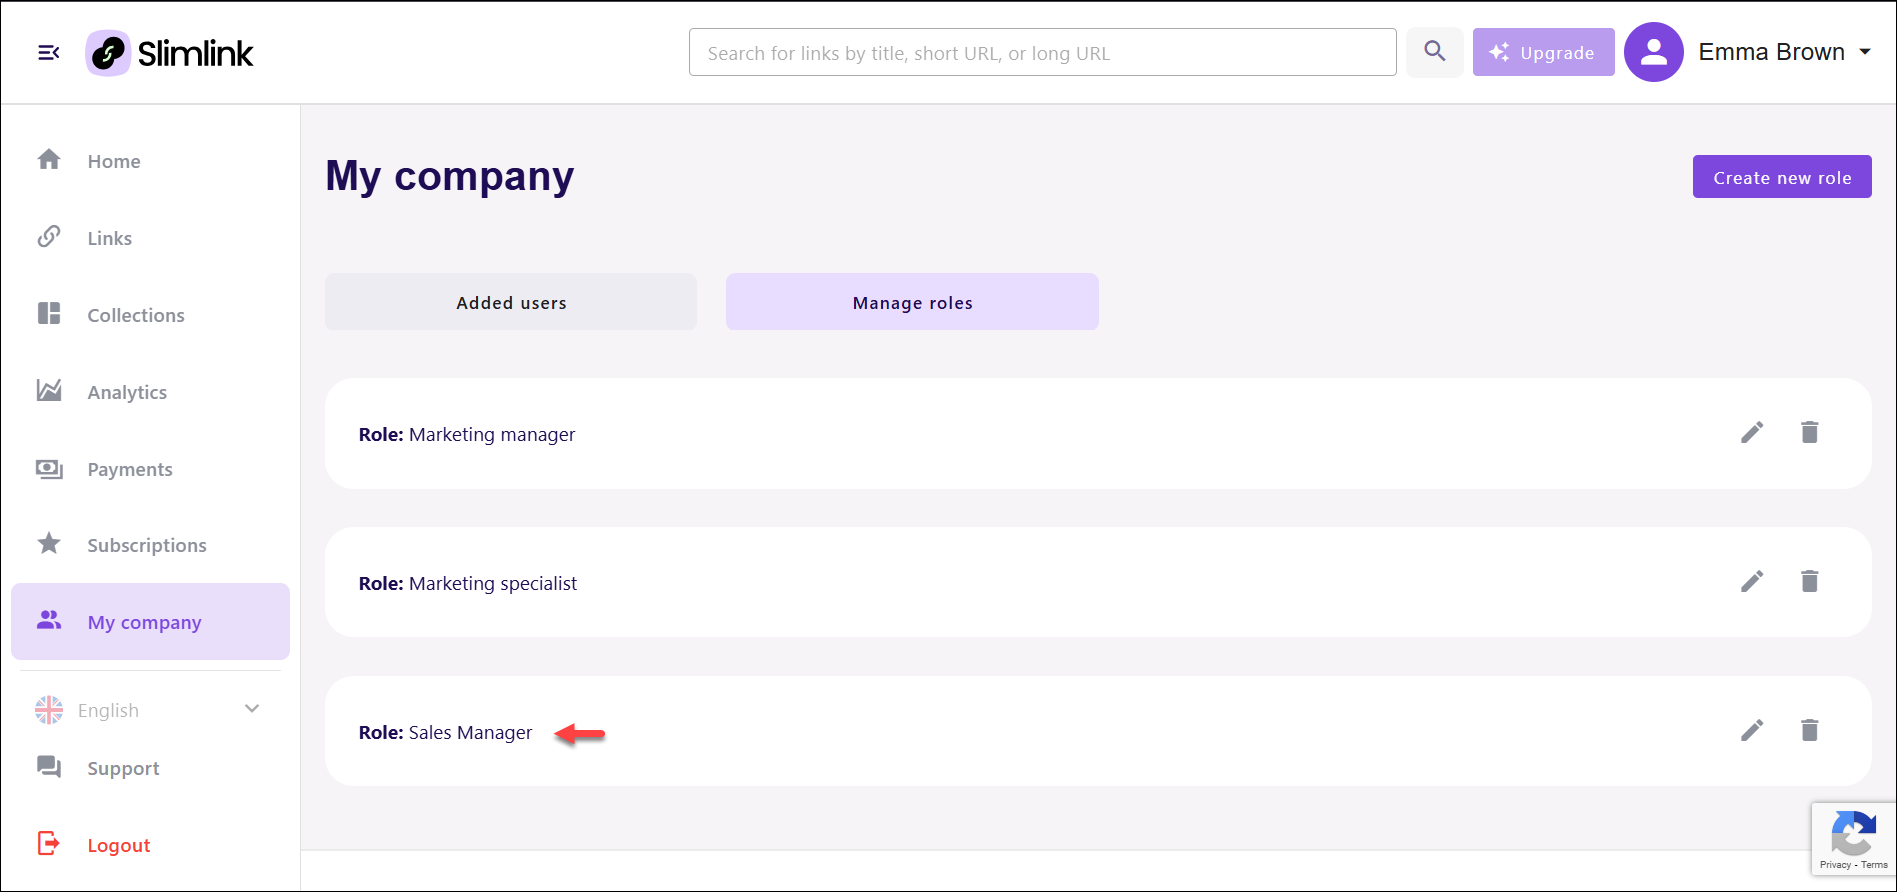
Prerequisites:
- Account Owner: Only the person who owns the account (the company owner) has the authority to add new team members and create roles. This ensures that team management is controlled by a central figure who has overall responsibility for the account and its settings.
- Paid Subscription Plan: To unlock the functionality of team management, including adding members and creating roles, you must have a paid subscription plan. Free plan does not support such advanced features, as they are intended for more complex and collaborative setups.
Creating roles
Creating custom roles allows you to tailor permissions based on the responsibilities and requirements of different team members. For example, you can assign higher-level roles, such as Admin, with full access to all features, while limiting other roles to more specific permissions, like only viewing or editing certain links.To create a new role:
- Log in to your Slimlink account.
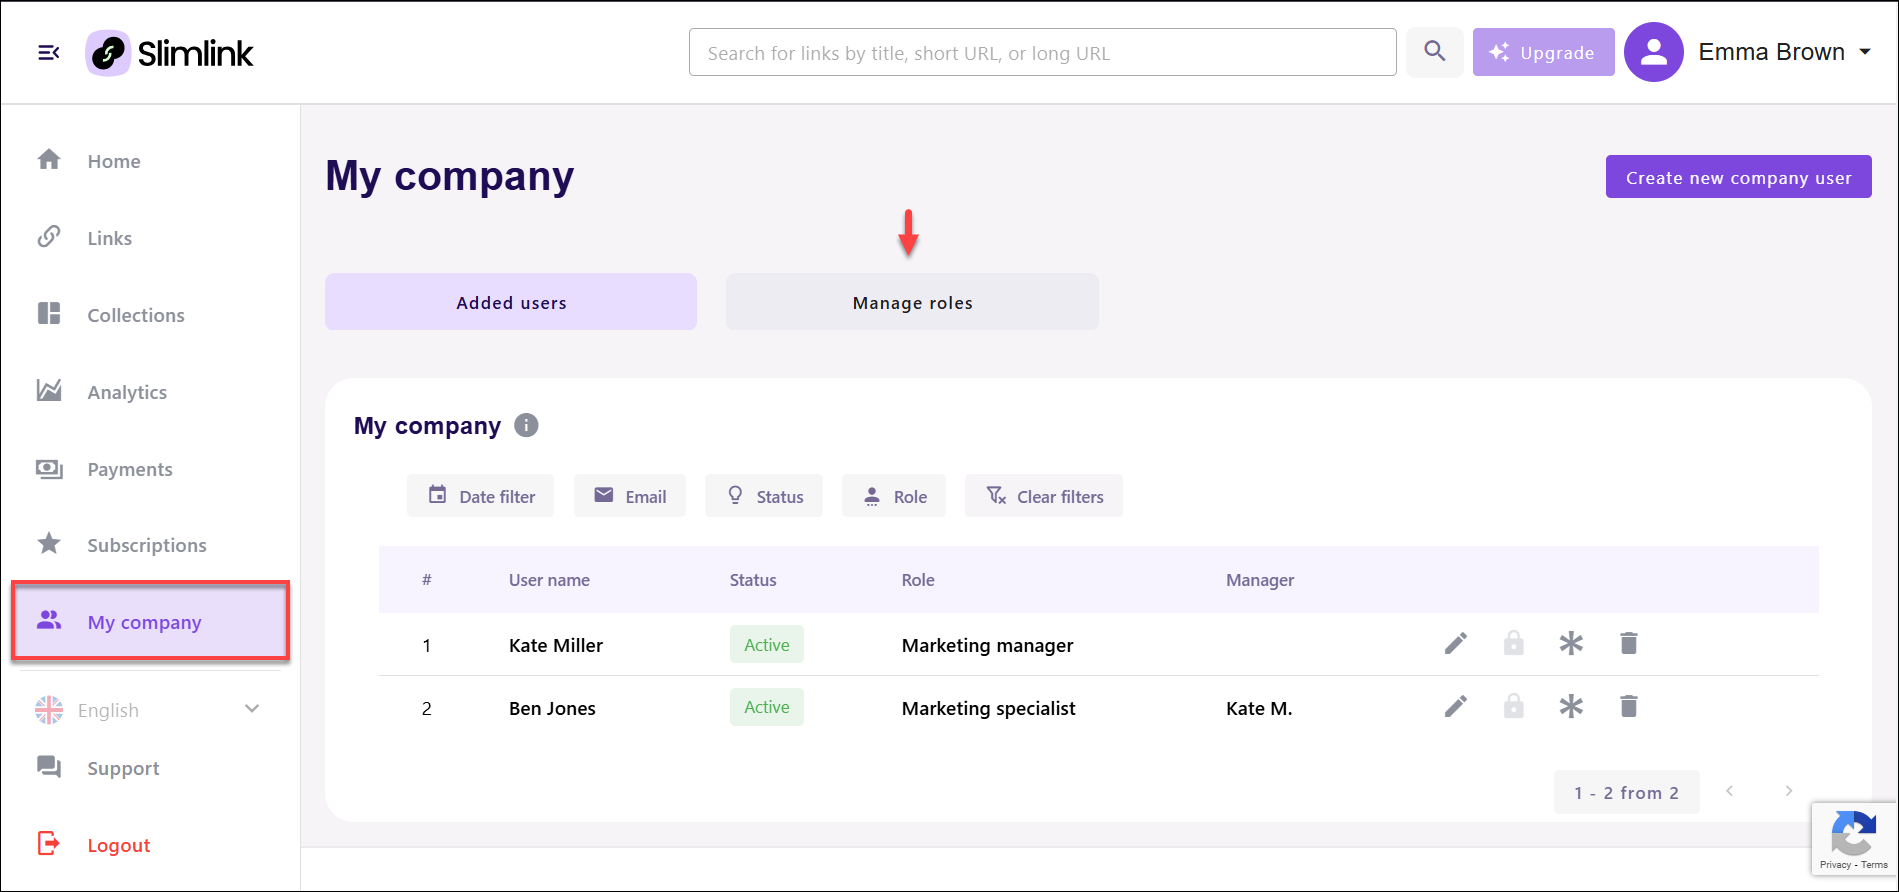
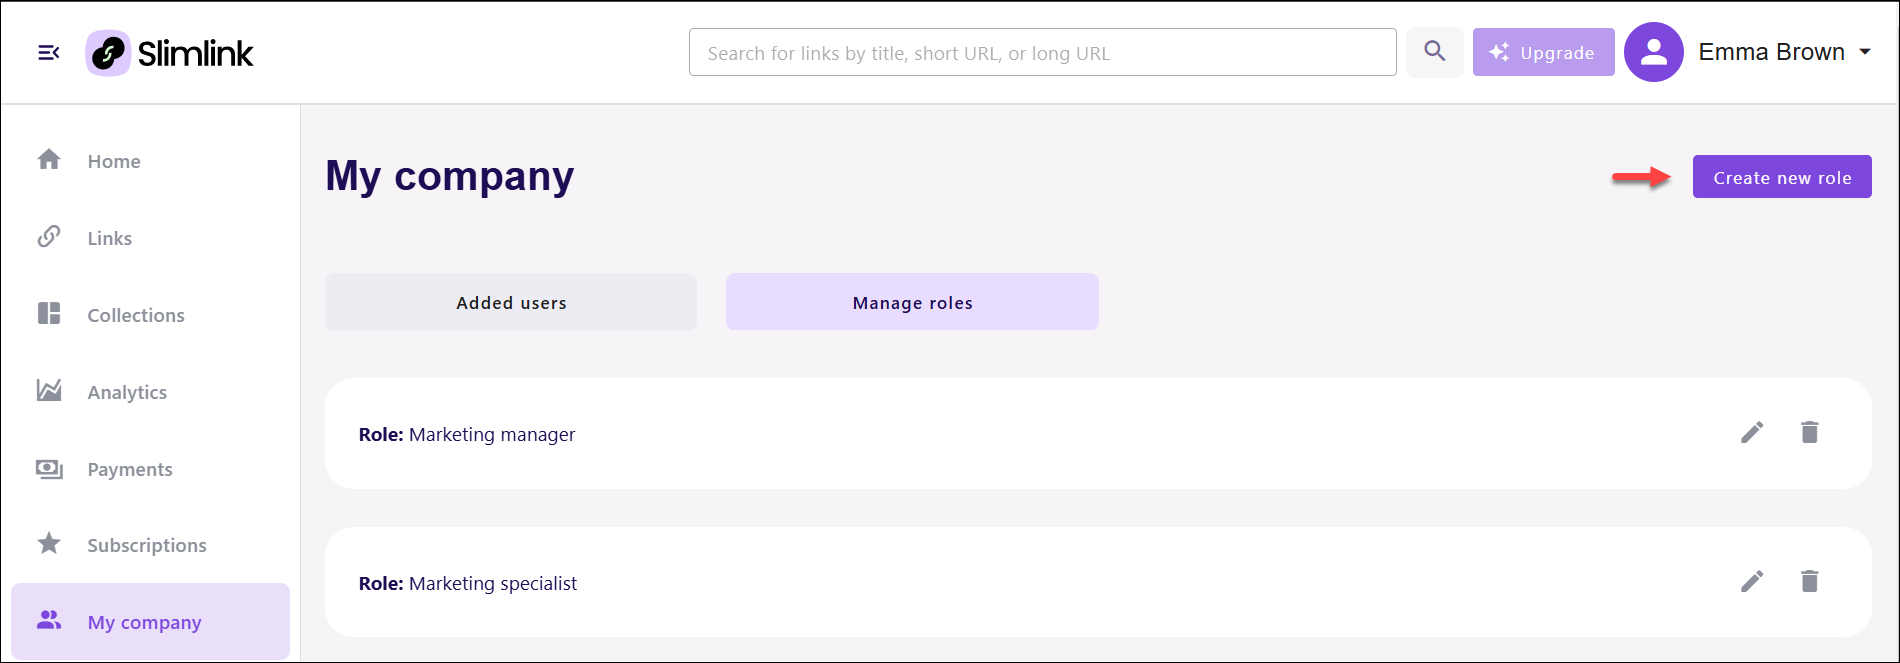
- Navigate to the My company section and select Manage roles.
- On the Manage roles page, click Create new role.
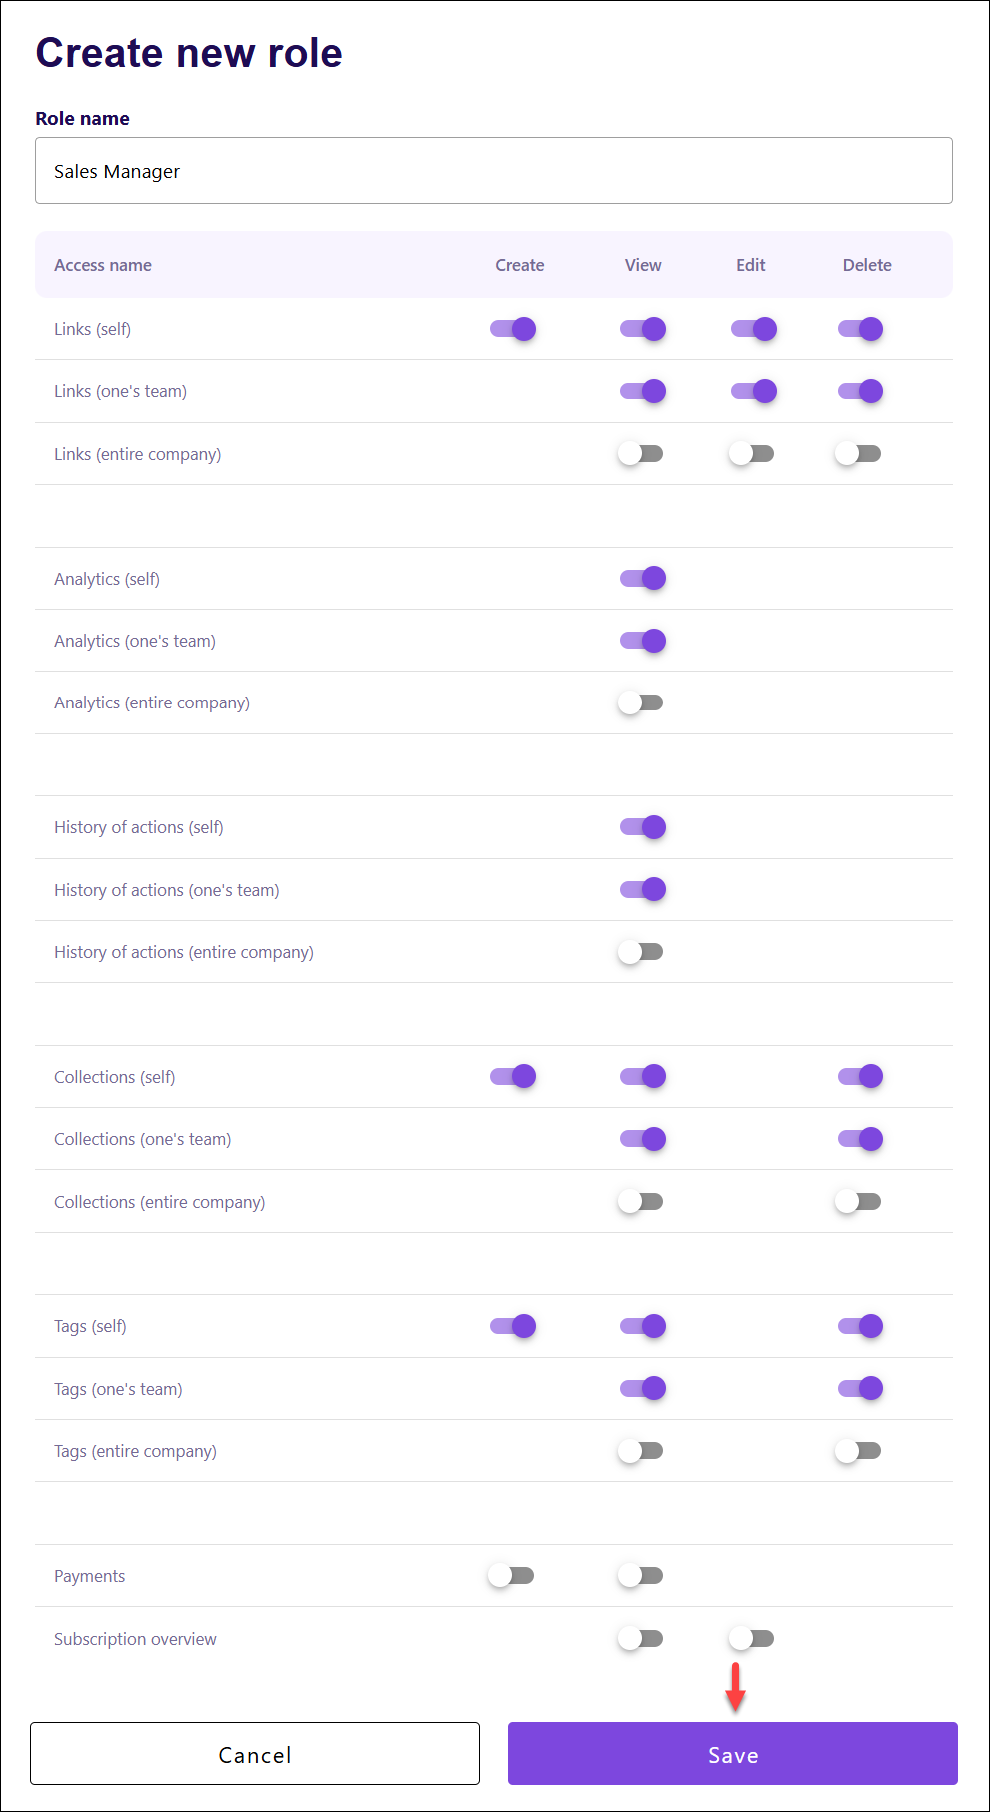
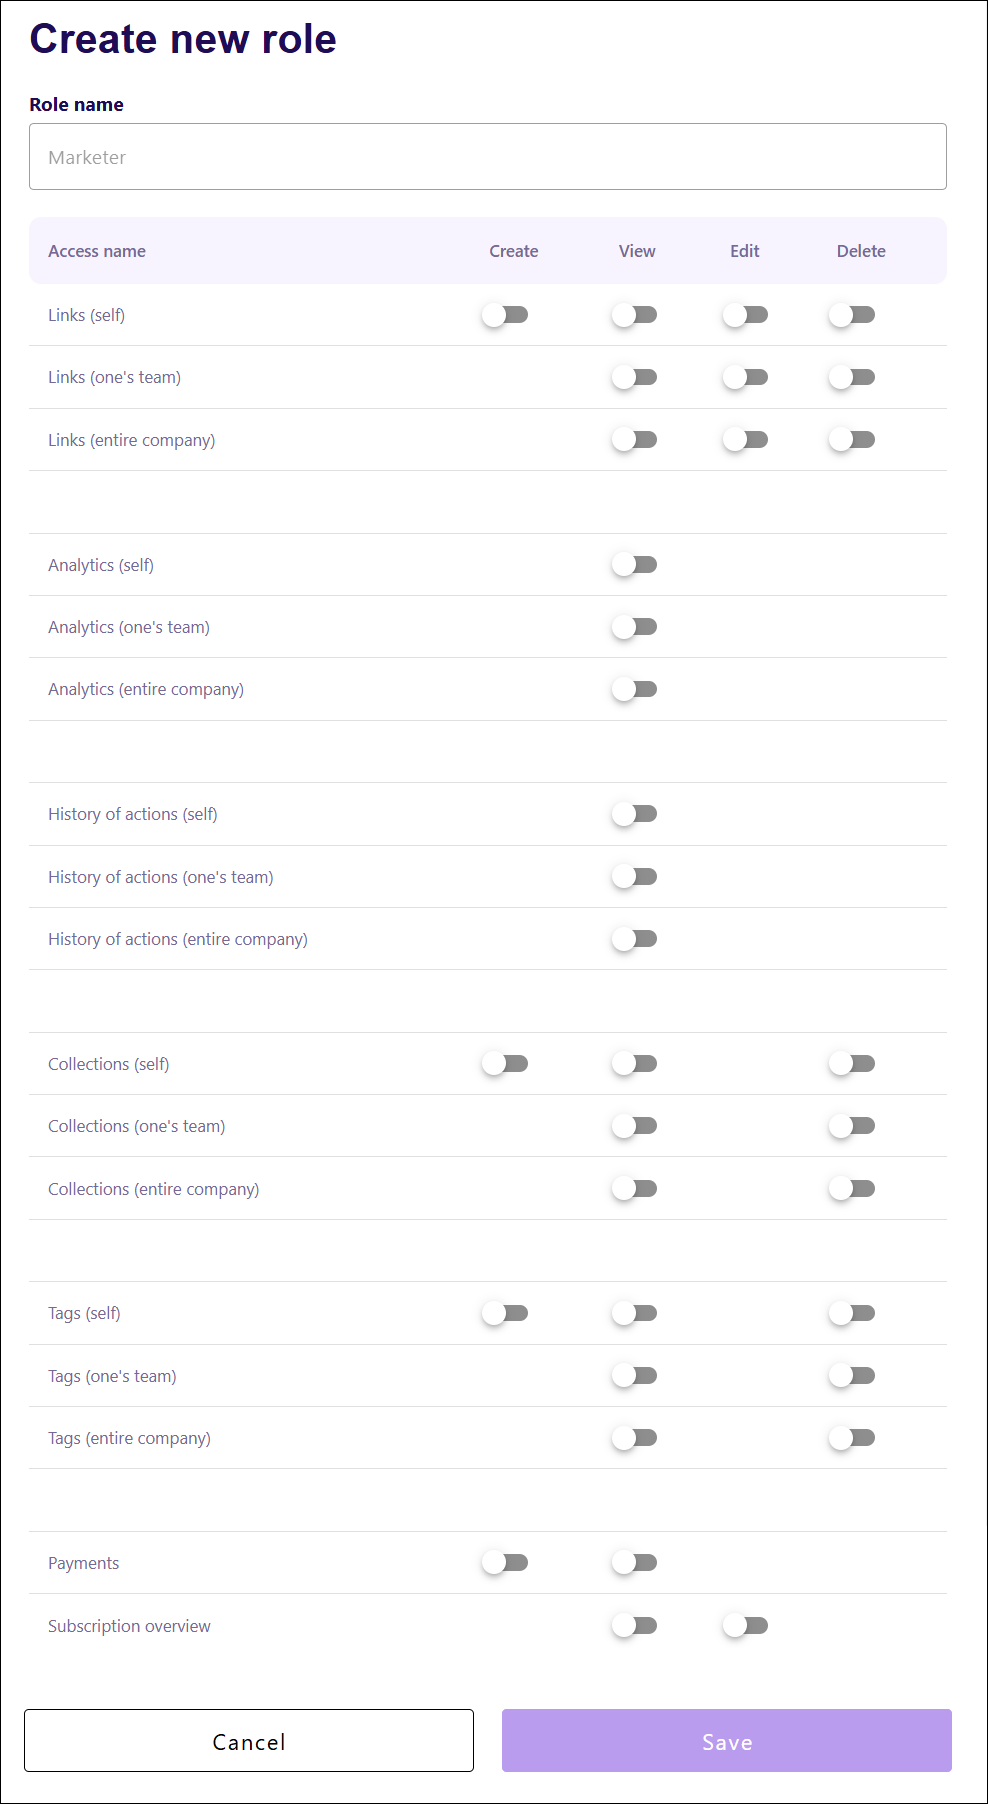
- In the opened window, enter the Role name and select the permissions associated with the role from the table as described below.
Actions:
- Create: Indicates whether the role has the permission to create new items (e.g., links, collections, tags) within the specified access area. Toggle switches in this column allow enabling or disabling this permission for each feature.
- View: Specifies whether the role can view items or data in the specified access area. Toggle switches enable or disable the ability to access information, such as viewing links, analytics, or payment details.
- Edit: Determines if the role can make changes to existing items in the specified access area. Toggle switches allow enabling or disabling editing permissions for each feature.
- Delete: Indicates whether the role can delete items in the specified access area. Toggle switches in this column control the ability to remove links, collections, tags, or other elements from the system.
Access categories:
- Links (self): Grants access to manage links created by the individual.
- Links (one's team): Provides access to manage links created by members of the team.
- Links (entire company): Enables access to manage links created across the company.
- Analytics (self): Allows viewing analytics related to the individual’s links, such as link performance metrics.
- Analytics (one's team): Provides access to analytics related to the team's links. This includes viewing performance data for links created by team members.
- Analytics (entire company): Grants access to analytics data for all links created within the company. This includes company-wide performance metrics and reporting.
- History of Actions (self): Enables viewing the history of actions performed by the individual, such as link modifications or other activities.
- History of Actions (one's team): Grants access to view the history of actions performed by team members, allowing oversight of team activities.
- History of Actions (entire company): Provides access to view the history of actions across the company. This includes actions performed by all users in the system.
- Collections (self): Allows managing collections created by the individual, including creating, viewing, editing, or deleting their collections.
- Collections (one's team): Enables management of collections created by team members, including creating, viewing, editing, or deleting team collections.
- Collections (entire company): Grants access to manage all collections created within the company, allowing for company-wide collection management.
- Tags (self): Provides the ability to manage tags associated with the individual’s links, including creating, editing, or deleting tags.
- Tags (one's team): Allows managing tags associated with links created by team members, including creating, editing, or deleting these tags.
- Tags (entire company): Enables the management of tags across all links in the company, including creating, editing, or deleting tags on a company-wide level.
- Payments: Grants access to payment-related data and transactions. This includes permissions for managing or viewing payment details.
- Subscription Overview: Provides access to view or manage subscription details for the account, such as current plans and usage limits.
Once done, click Save to add a new role. In this case, let’s create a role for a Sales Manager with access scope for their own and their team’s data.
Editing roles
Editing roles offers significant flexibility as your team evolves or as business needs change. By adjusting the permissions of existing roles, you can easily accommodate new responsibilities, skill sets, or shifts in workflow without the need to create entirely new roles. This ensures that your team structure remains aligned with your company objectives and operational changes.To edit a role:
- Log in to your Slimlink account.
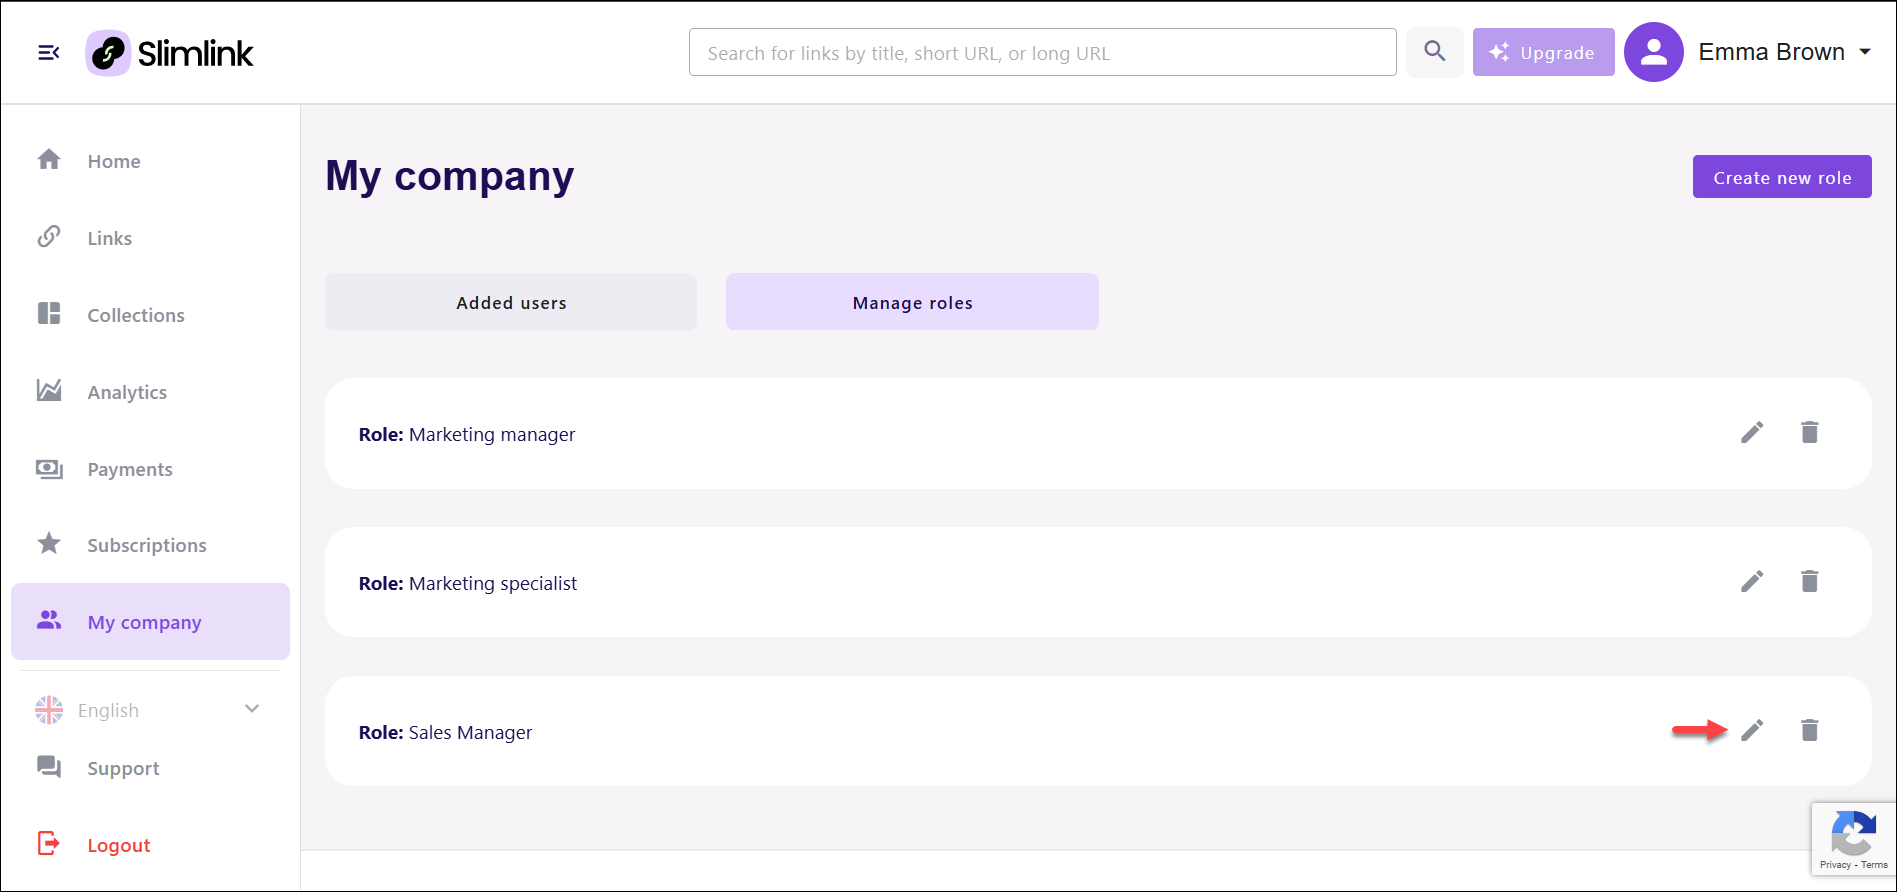
- Navigate to the My company section and select Manage roles.
- On the Manage roles page, click Edit icon against the required role.
- In the opened window, edit the scope of permissions using the toggles. In this case, let’s expand the access scope of a Sales Manager to viewing all company links and analytics.
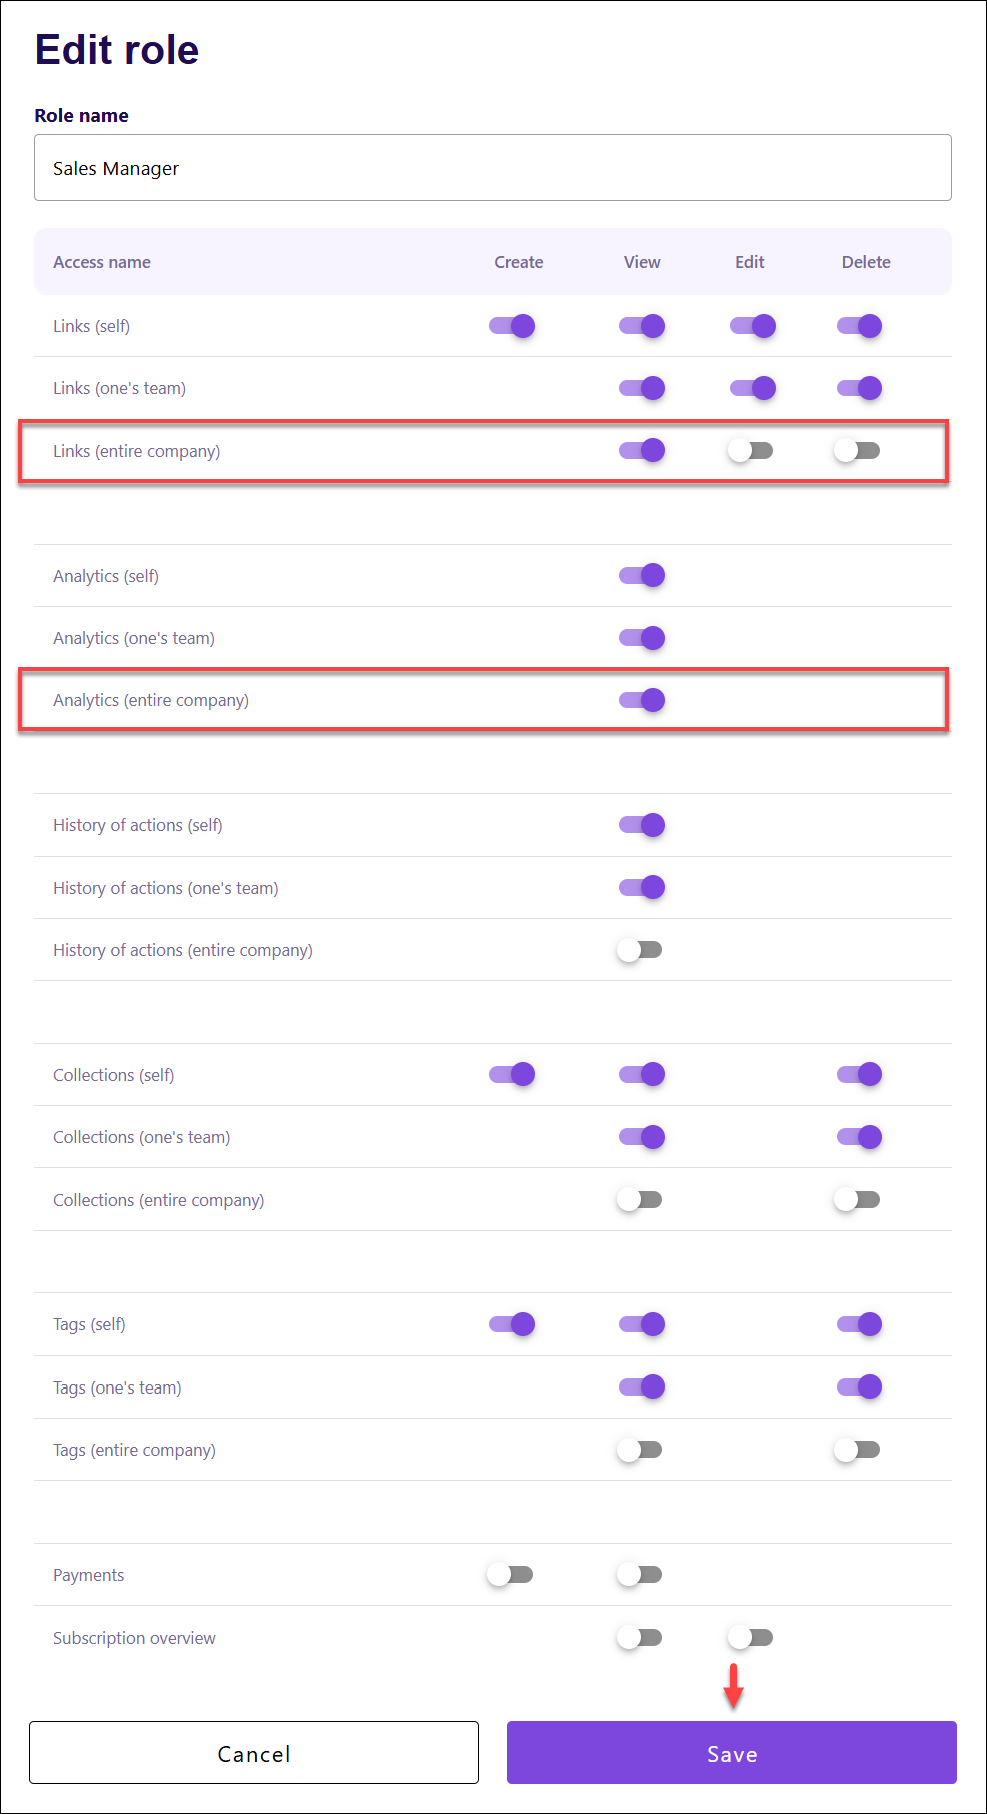
- Finally, click Save to apply the changes.
Deleting roles
If a role is no longer needed, it can be deleted to help maintain a streamlined structure and reduce clutter within your team management system. Deleting obsolete roles prevents unnecessary complexity and ensures that your team hierarchy remains clear and efficient. It also eliminates any confusion about permissions, ensuring that only relevant roles with specific access rights are📄 You cannot delete a role if it has been assigned to any user. To delete a role, ensure that it is no longer assigned to any team member.
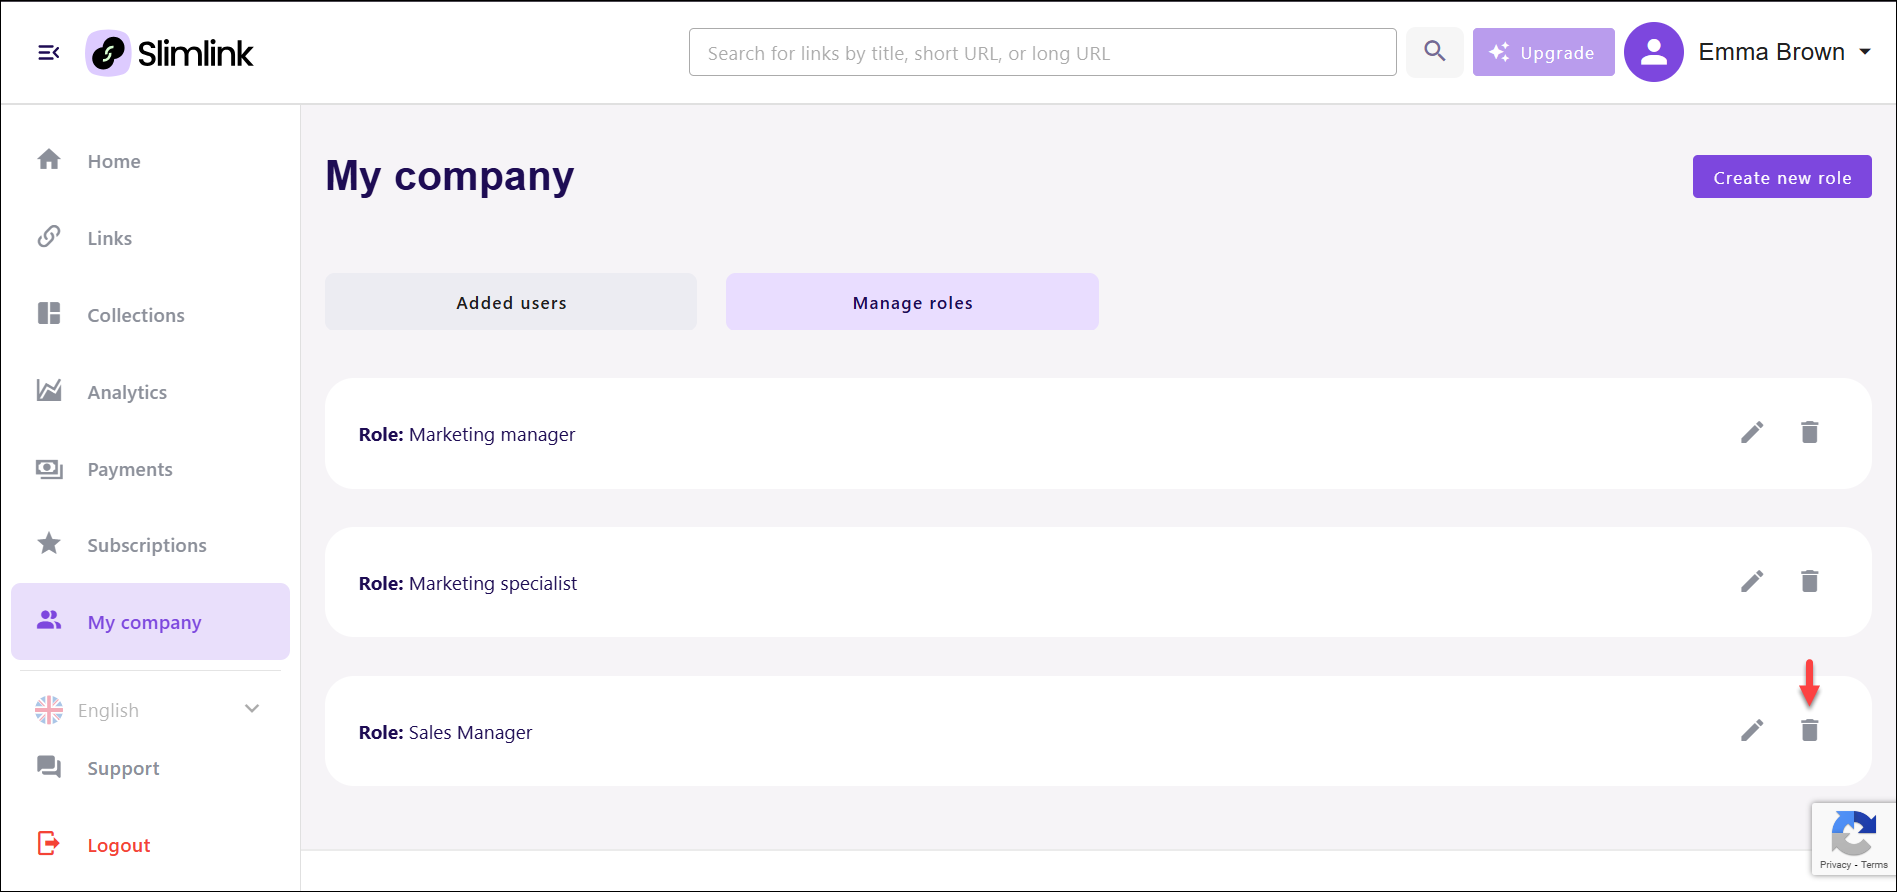
To delete a role:
- Log in to your Slimlink account.
- Navigate to the My company section and select Manage roles.
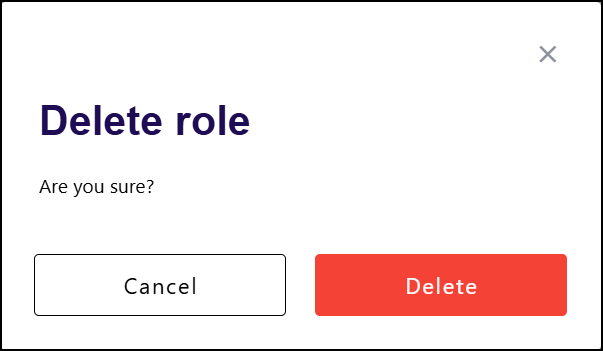
- On the Manage roles page, click Delete icon against the required role.
- Confirm your action in the pop-up window to delete a role.