Managing company users on your Slimlink account allows you to collaborate effectively by controlling who has access to your workspace. Adding new users lets you expand your company capabilities, while removing members helps maintain security and keep your team up to date with current collaborators. You can also edit user details or permissions, allowing for flexibility as roles evolve and ensuring every team member has the appropriate level of access to contribute effectively.
Prerequisites:
- Account Owner: Only the person who owns the account (the company owner) has the authority to add new team members and create roles. This ensures that team management is controlled by a central figure who has overall responsibility for the account and its settings.
- Paid Subscription Plan: To unlock the functionality of team management, including adding members and creating roles, you must have a paid subscription plan. Free plan does not support such advanced features, as they are intended for more complex and collaborative setups.
Creating company users
Creating company users allows you to build a collaborative workspace tailored to your team needs. As the account owner, you can invite team members to join your company account, assign them roles with specific permissions, and set up access levels. This ensures each member has the tools they need while maintaining control and security over your account.To add a new company user to your account:
- Log in to your Slimlink account.
- Navigate to the My company section and click Create new company user on the Added users page.

- In the opened window, fill in the fields as described below.
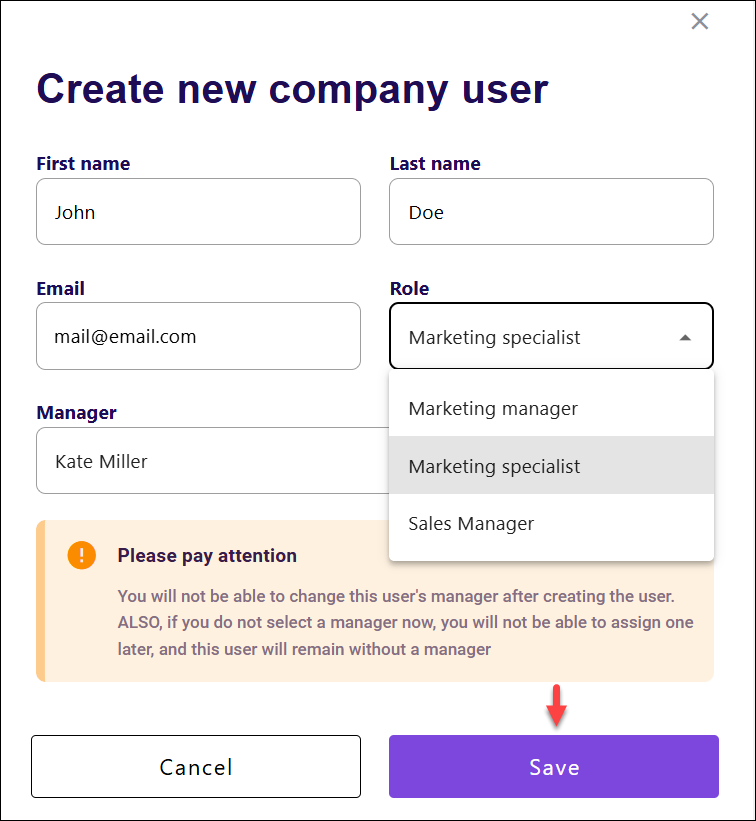
- First Name: Allows specifying the first name of the individual for identification within the system.
- Last Name: Allows entering the last name of the individual to complete their full name in the company records.
- Email: Specifies the email address to serve as the primary contact and identifier for the individual.
- Role: Provides a dropdown menu to select the individual's position or designation within the company, which defines their access rights and permissions. The list contains all roles configured by the account owner. See How to manage roles on Slimlink? for more details.
- Manager: Allows to select the manager assigned to the individual. If no manager is selected, the individual will remain unassigned to any manager. The list contains all users with the manager roles created by the account owner.
📄 Once a user has been added to the company, their designated manager cannot be changed or reassigned. This ensures that the hierarchy and reporting structure within the team remain consistent. If changes to the reporting structure are necessary, it may require removing the user and re-adding them under a different manager. This fixed assignment helps maintain clear accountability and organizational clarity within your team. - Once done, click Save to create the individual in the company system with the specified role and manager assignment.

Editing company users
Editing company users gives you the flexibility to adapt to changing team dynamics. You can update a member’s role to grant or restrict permissions, change their contact details, or deactivate their account if they no longer need access. This ensures your team structure remains aligned with your company current requirements while maintaining security and efficient collaboration.To edit a company user:
- Log in to your Slimlink account.
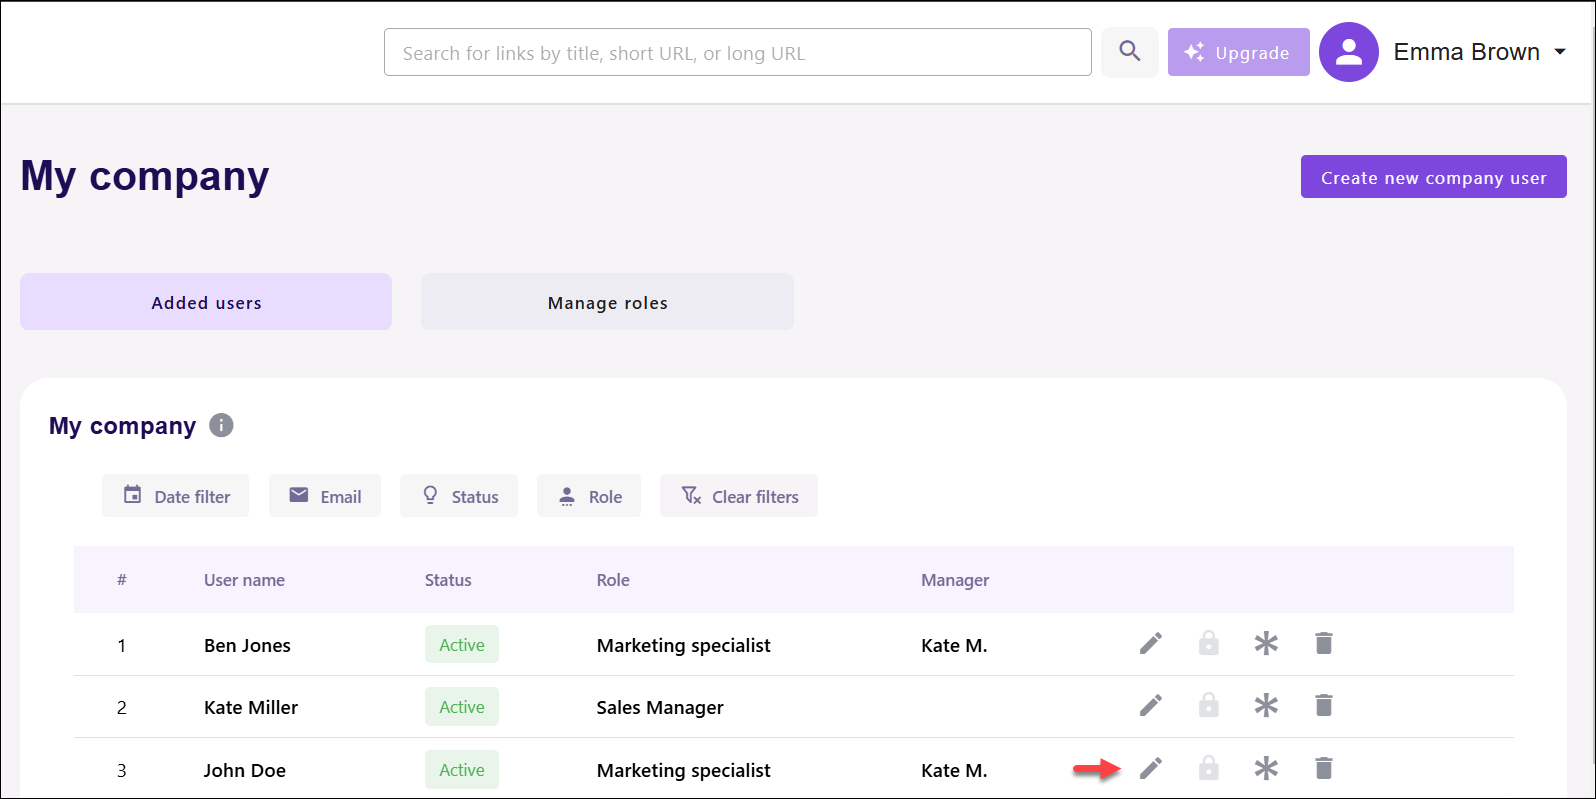
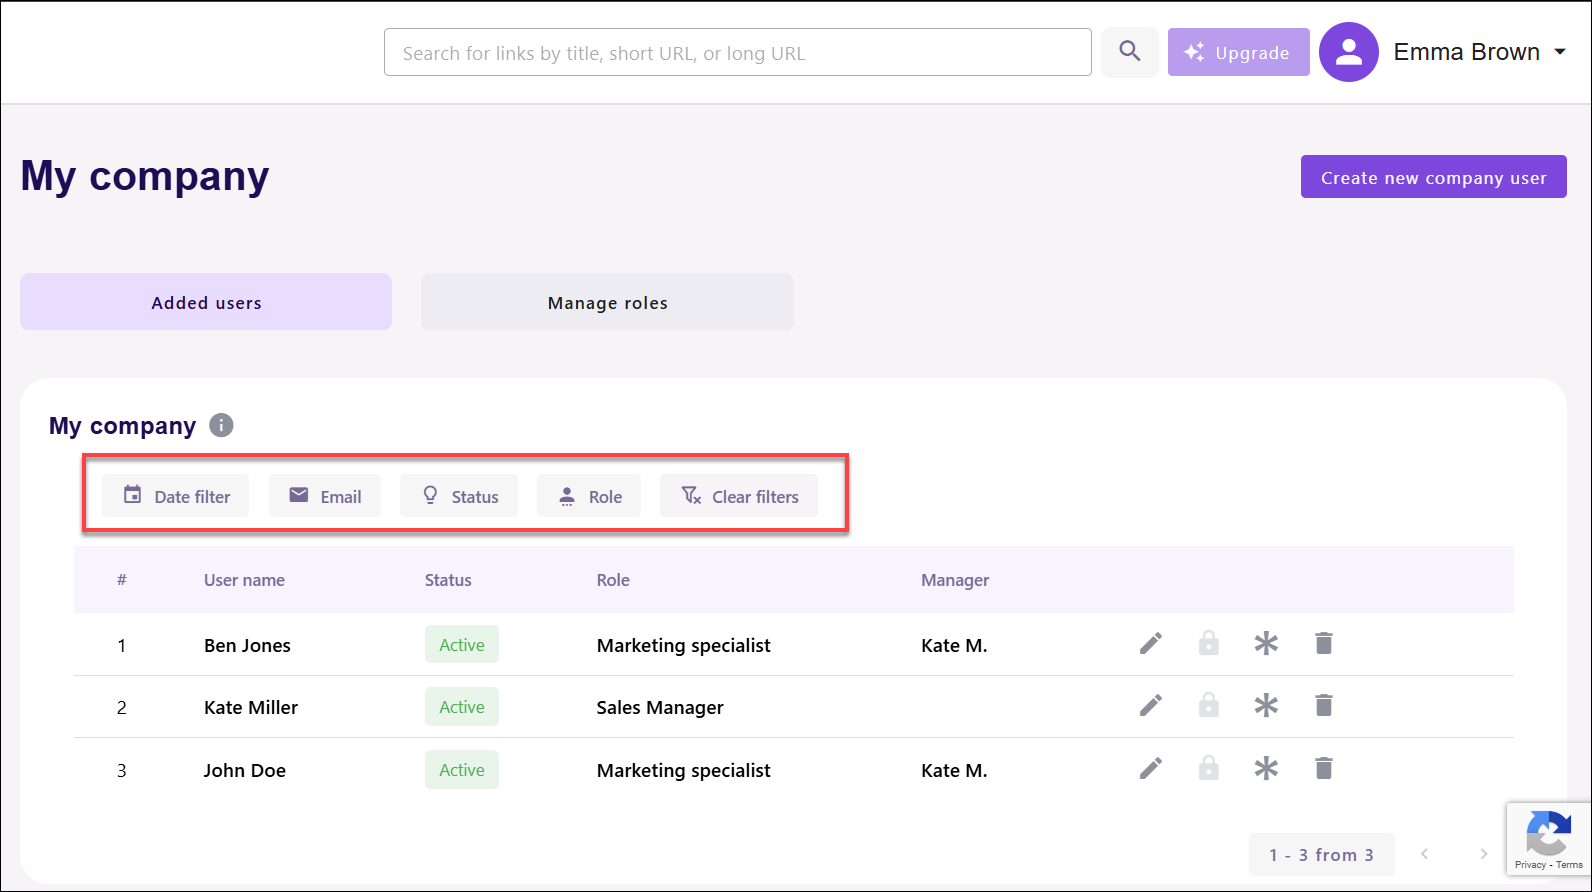
- Navigate to the My company section, and find the user to be edited. You can use the filters to quickly locate the required entry.

- Date Filter: Enables filtering records based on a specified date range to narrow down entries within a selected timeframe.
- Email: Allows filtering records by email address to locate specific individuals or entries associated with a particular email.
- Status: Provides filtering by status to view records based on predefined states, such as active or blocked.
- Role: Allows filtering records based on the role assigned to individuals, enabling focused viewing of specific designations.
- Click the Edit icon against the required user.
- In the opened window, update user details. Note that the manager cannot be changed or assigned at this stage. Currently, the email address also cannot be changed, even though it appears editable.
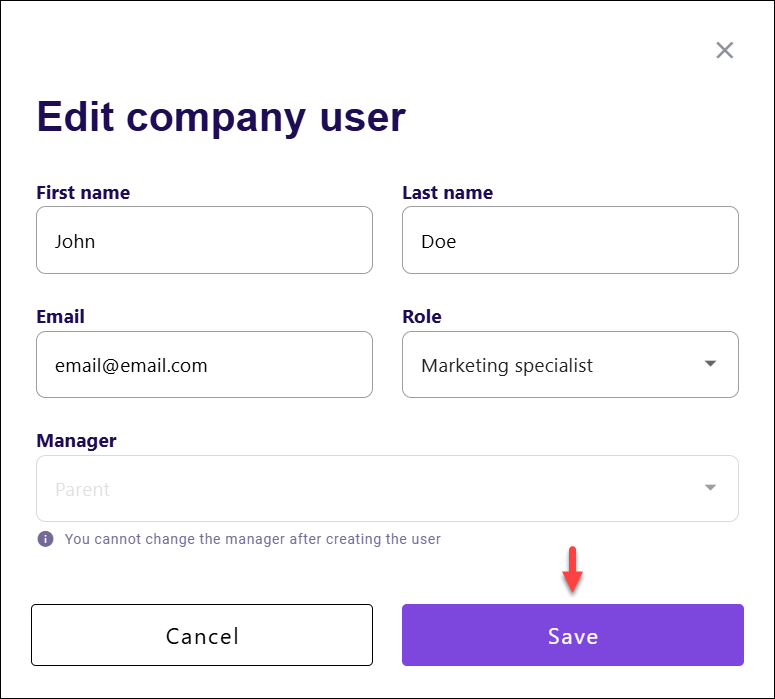
- Once you’ve made the necessary updates to the user details or role assignments, click Save to confirm and apply the changes. This ensures that the updates take effect immediately, allowing the user to continue working with their updated permissions or information.
Deleting company users
Deleting company users allows you to maintain control over your workspace by removing individuals who no longer need access. This action revokes their permissions and prevents them from interacting with your account or data. By keeping your user list updated, you ensure that only active team members have access, which strengthens security and optimizes team management.To delete a company user:
- Log in to your Slimlink account.
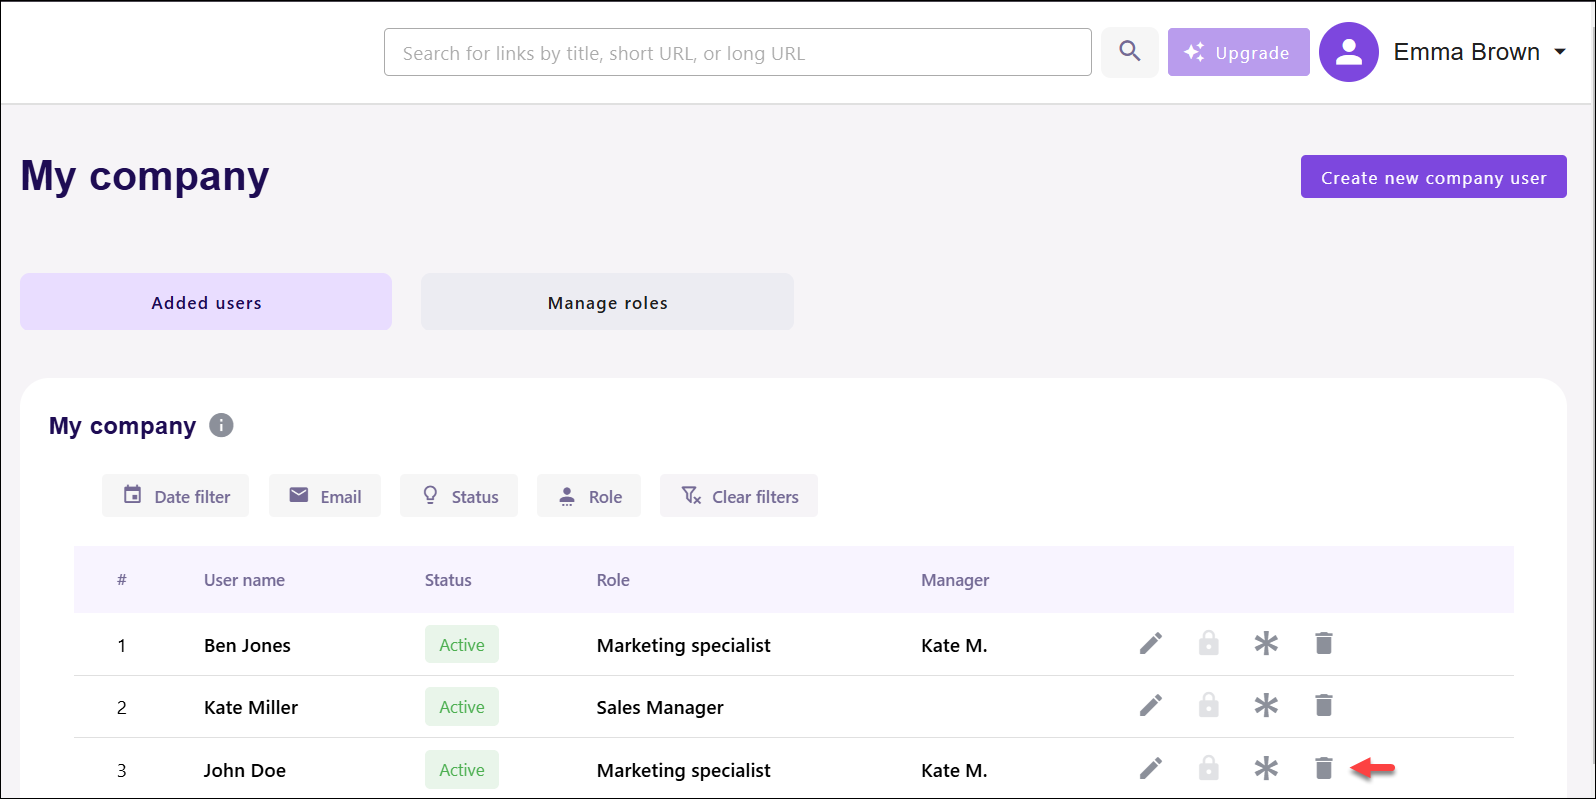
- Navigate to the My company section, and find the user to be deleted. You can use the filters to quickly locate the required entry.
- Click the Delete icon against the required user.
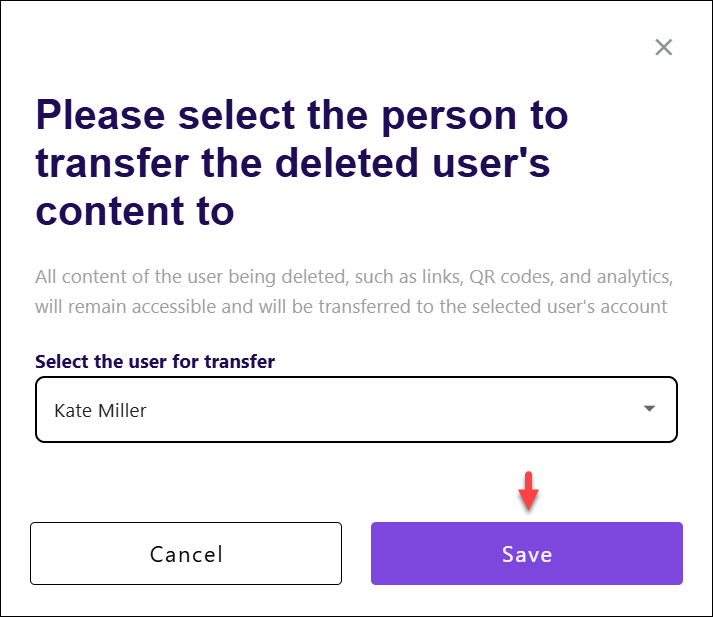
- As the next step, select whether you want the data associated with the user deleted, or kept and transferred to another user of managerial position, and click Delete to proceed.
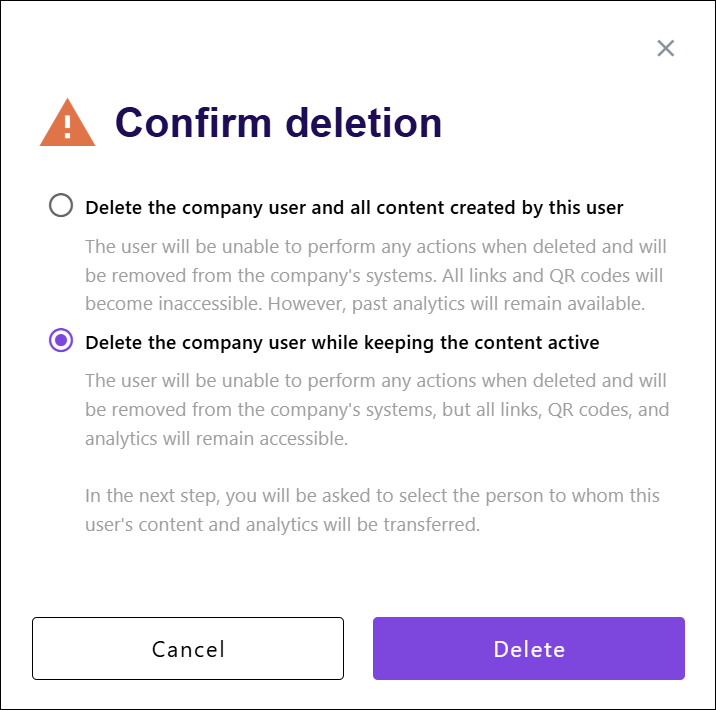
- If you selected the first option, the user will be deleted along with all associated data. If you selected the second option, in the opened window, choose a user to transfer the data to, and click Save to complete the process.